
Hey everyone, I haven’t written in a while I know, in one of my previous articles in yocto I said I’d expose my yocto recipes as a git repo and I really wanted to do this on my own domain. However, GoDaddy started to show some issues here, you saw how I overcame them in my previous article about installing git on GoDaddy but didn’t it seem like a forced approach? Especially with installing all those dependencies.
I also have another article to write up about LabVIEW NXG’s Web Module where I’ve created a demo of it which had similar issues, forcing Python3 and my own modules into my home directory due to a lack of admin privileges. As I started to venture into making a public repo I saw many packages out there but didn’t want to start hacking away at an already fragile system. Btw, the solution was actually much simpler in the end! Lols.
Anyway, so I decided, nope to GoDaddy, having had experience with AWS in the past hosting a web server I decided to have a look what is out there and came across kamatera, very reasonably priced at $6/month compared to AWS’s $1330/month and even cheaper than my current GoDaddy costs at £25/quarter ($11.50/month).
So I started out by signing up, selecting a reasonably modest server of 1GB RAM, 30GB ROM, minimal CPU and Ubuntu 18.04. I then followed the following article to get started:
Looking at this article, steps 1 and 2. For step 3, we already have a sites available config but do add the recommended lines to the existing one:
https://www.digitalocean.com/community/tutorials/how-to-install-wordpress-with-lamp-on-ubuntu-18-04
Before moving into step 4 and 5 there are some big differences for a migration rather than creation. Step 4 is irrelevant as I already have a wordpress setup. Instead I downloaded all of my files from public_html on GoDaddy and then reuploaded these to my new VM server.
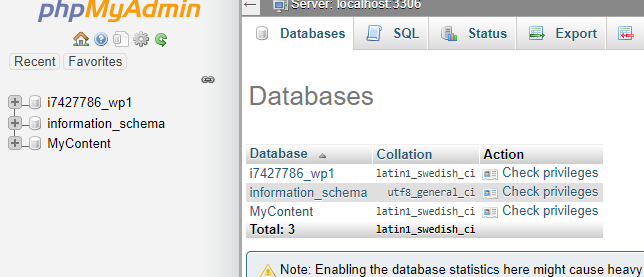
Step 5 is a necessary step whilst step 6 is ignored because again, wordpress is already setup. Before doing step 5 though, we need to setup mysql and replicate our databases. Looking at phpMyAdmin in cPanel I have two databases that I use, wordpress and “MyContent” which I use as a counter from part 3 of building the website:
So, going into mysql with:
mysql -u wordpress -pAnd entering the password I chose in part 2, now I wanted to rename my wordpress database to be simple so ran:
CREATE DATABASE MyContent;
CREATE DATABASE wordpress;
Next, back in phpMyAdmin I selected my wordpress database and export:
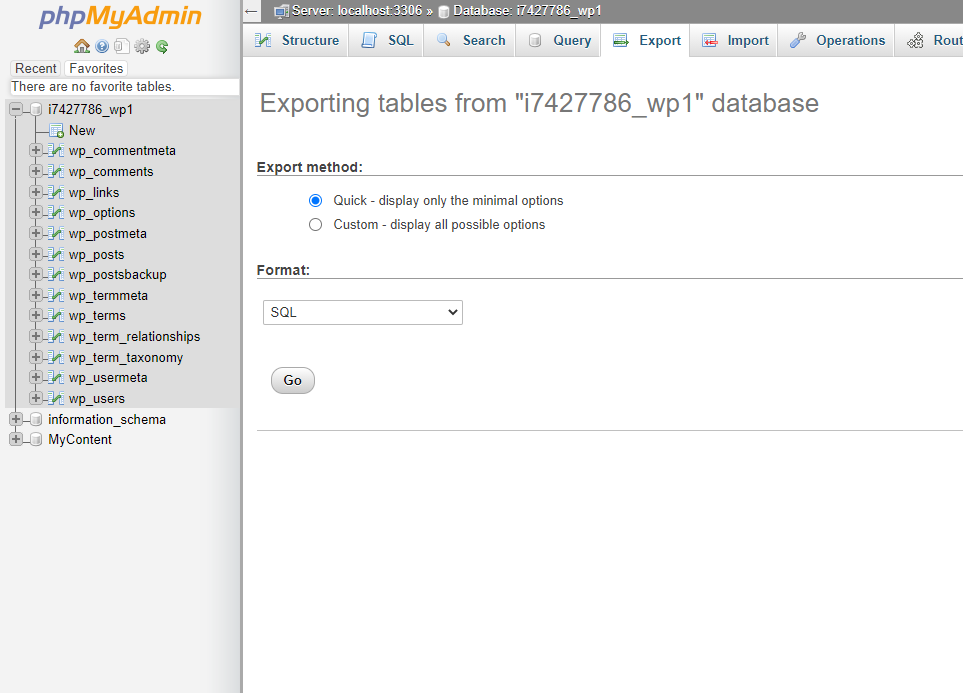
I repeated this for MyContent. I then go back to WinSCP and upload my two sql files I downloaded and then reupload those to my new server. In PuTTy with mySQL still I open I then select to use each database and ran the subsequent SQL commands:
USE wordpress;
source /tmp/wordpress.sql;
USE MyContent;
source /tmp/MyContent.sql;
Now, that’s the mysql setup, we can proceed with step 5. Here, entering the details of my new mysql database. Should be working now correct? Never! Things are never that simple, basic answer why? Because GoDaddy on a shared server has a unique non-default apache2.conf setup which I couldn’t replicate as it’s non-readable so had to work through the issues myself.
My first issue was that my Project’s menu was throwing back an error. So let’s go take a look at that error:
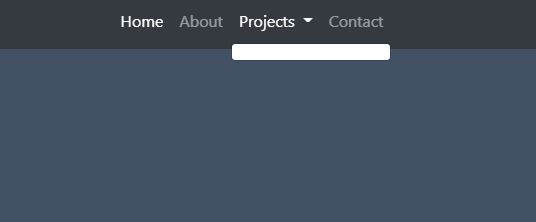

CORS is the bane of my life and this one kept me busy for quite a while. Not running through everything in it’s entirety I’ll just share what I learned: the address in the link “wp-json/wp/v2/categories” is an auto generated directory for starters, there’s a big link between wordpresses internal settings and what headers to send it.
My other big problem was even in the admin panel, wordpress is a bit dodgy about which origin it uses/URL. Now if you remember in part 3 I finished up by suggesting my next article would include Search Engine Optimization. I do apologise for not writing this up also, I got swamped preparing for a job interview and had to put everything down for a bit but I did do it. One of the key things in that soon to be article is that google prefers you to limit the possible URL’s and if possible, use HTTPS (I don’t have a self signed certificate so I skipped that one. But, in order to do this you need to put a redirection rule into .htaccess on your root directory:
RewriteEngine on
rewritecond %{http_host} ^edward-jones.co.uk [nc]
rewriterule ^(.*)$ http://www.edward-jones.co.uk/$1 [r=301,nc]
RewriteEngine On
RewriteCond %{HTTPS} on
RewriteRule ^ http://%{HTTP_HOST}%{REQUEST_URI} [L,R=301]
It’s fairly readable other than the all the wildcards but basically we set a condition to re-direct edward-jones.co.uk to the www. I also redirect all https traffic to http. So, you’ll see why it’s complaining about this www, it’s forced. But why should that be a problem? Two fold, in my htaccess file I have:
Header unset Access-Control-Allow-Origin
Header set Access-Control-Allow-Origin "http://www.edward-jones.co.uk"
This is now a great setup because it mostly forces one URL usage and restricts CORS to only that URL, a pretty secure setup. Now one final issue I noticed which wasted a few hours until I made the link between CORS and wordpresses auto generated links. When I setup wordpress initially this was not an issue but a change was because it then added the new IP since we were using just this before I migrated the actual DNS across. This resulted in either a CORS issue or a 403 forbidden which wasn’t documented anywhere for the 403. This gave me a clue it was a URL issue:
https://wpmudev.com/forums/topic/wp-json-showing-403-forbidden/
Unlike but like that post I noticed that whenever I was in the wordpress admin panel it displayed the URL as my static IP Address rather than my actual domain. So I had to go and change the address settings under general and force one URL style for CORS to work:
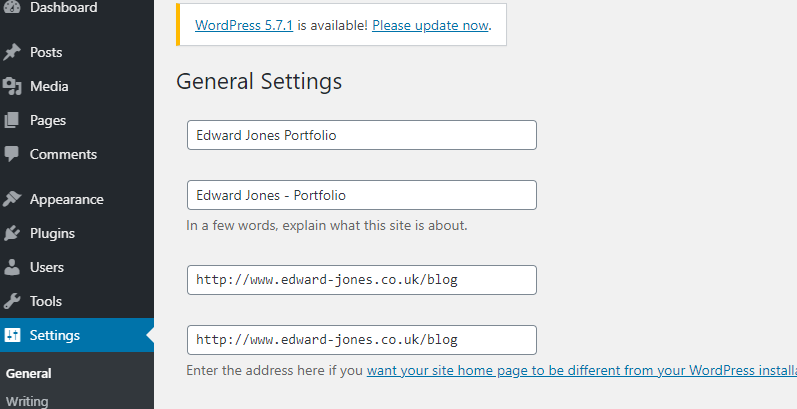
Okay, that is everything working now right? Wrong again, one final bit is that the media upload directory is also a forced internal link so we had to update that too:
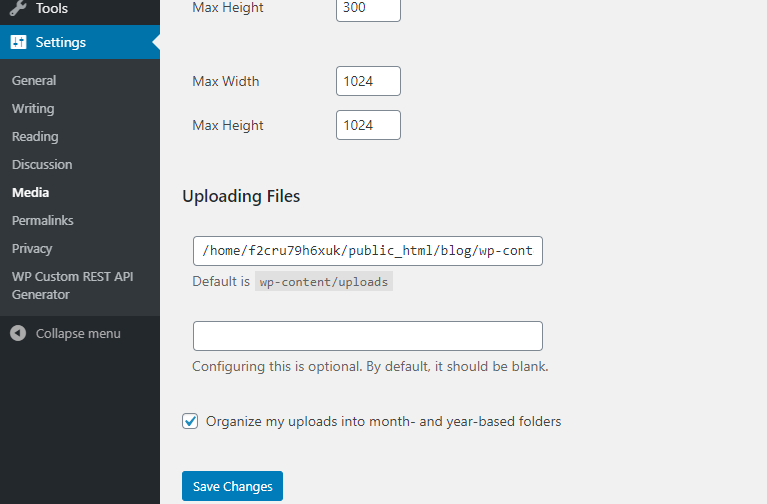
Now that I updated this as well, the frontend worked, the backend worked and so did my NXGWeb example that I’ll write up later as mentioned. One final thing you might want to do is allow settings and do from the wordpress directory:
chmod -R 777 ./*Now the website is ready on this new server. Let’s go and update the DNS to point to my new static IP address of my new server, under My Products in GoDaddy, DNS Management and then Manage DNS you simply enter into the three circled fields the new static IP address of your VM:
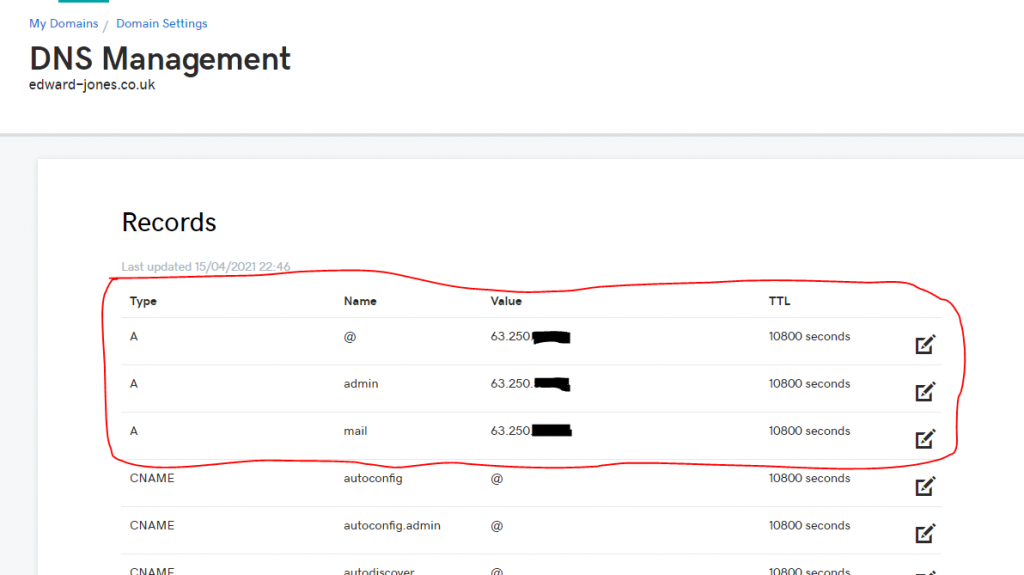
We have to wait for a while for that to take effect, if you want to speed it up you can reduce the TTL temporarily. I confirmed the change by placing a “easter.html” file on my new server which if accessible from http://www.edward-jones.co.uk/easter.html (as it didn’t exist on my GoDaddy server) then the switch had been made.
I found this fairly confusing to get going, my advise is, check your URL’s, appreciate the relationship between your URL, .htaccess (CORS) and WordPress settings in your wp-admin panel. I couldn’t have also figured it all out without checking my error files and access logs.
Thanks for sharing such a good opinion, piece of writing
is pleasant, thats why i have read it entirely
I do consider all of the concepts you have presented for
your post. They are very convincing and will definitely work.
Still, the posts are too quick for novices. Could you
please extend them a bit from subsequent time? Thanks for the
post.
Just want to say your article is as amazing. The clearness in your
post is just cool and i can assume you’re an expert on this subject.
Fine with your permission let me to grab your feed to keep
up to date with forthcoming post. Thanks a million and please carry on the gratifying work.