
Recently I’ve been trying to grow chilli’s and had some unsuccessful attempts but now after having a lamp and heat mat I have 4 chilli’s growing and more to come. During a call this week where I was advising a customer on how to use a Raspberry Pi I realised I never really use mine for hardware, only software applications. Well here comes an application!
For my first iteration I’ve acquired an ADC for the GPIO and some moisture sensors, it’ll purely be measurement to begin with and simply notify me via an app on my phone when the moisture levels are too low and I need to water them. So in this project I need to develop three things:
- The C program on the Raspberry Pi to monitor
- A service on my server to provide a location accessible via the internet to store and grab data as well as send push notifications from.
- An app on my android based phone.
I’ve played around with each of these concepts in recent weeks but nothing on this scale or with this applicability. To get started I reflashed my pi as it was using a broken image from when I was trying to load the NI Linux RT onto it. Then I used Advanced IP Scanner to locate the IP address but then I hit a stumbling block. SSH was refused, seems in new images it is disabled, no issue, this forum post helped:
https://www.raspberrypi.org/forums/viewtopic.php?t=167799
So now I’m in.. what now, well I’ve found this great article and whole heartedly agree with the author. The right language for the right job, don’t get me wrong, python is a good language (for data analytics and so forth), but C is the right tool here. There’s another article I need to write up where I in fact use python.
Unlike the authors’ suggestion though I decided to take an easier approach, this article was fantastic:
https://kevinboone.me/adc.html?i=1
Compiling his code example with:
gcc -o example example.cI then run the program and get data!
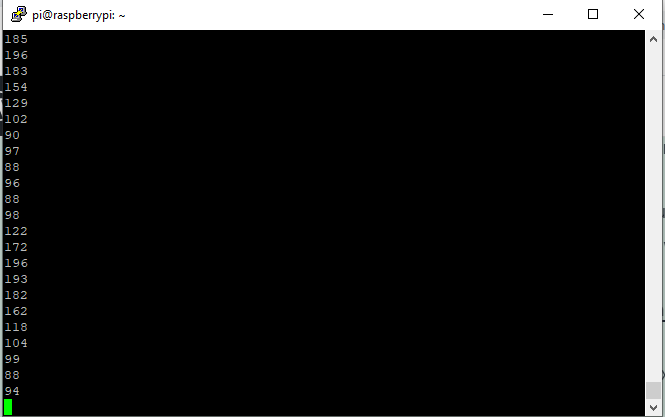
Obviously with nothing connected to my ADC I do expect random data so let’s get onto the next step. The setup seemed straight forward once again, I used this image on the article to confirm that it needs 5V as my sensor doesn’t have a model number, no details whatsoever!
https://www.instructables.com/Soil-Moisture-Measurement-With-Arduino/
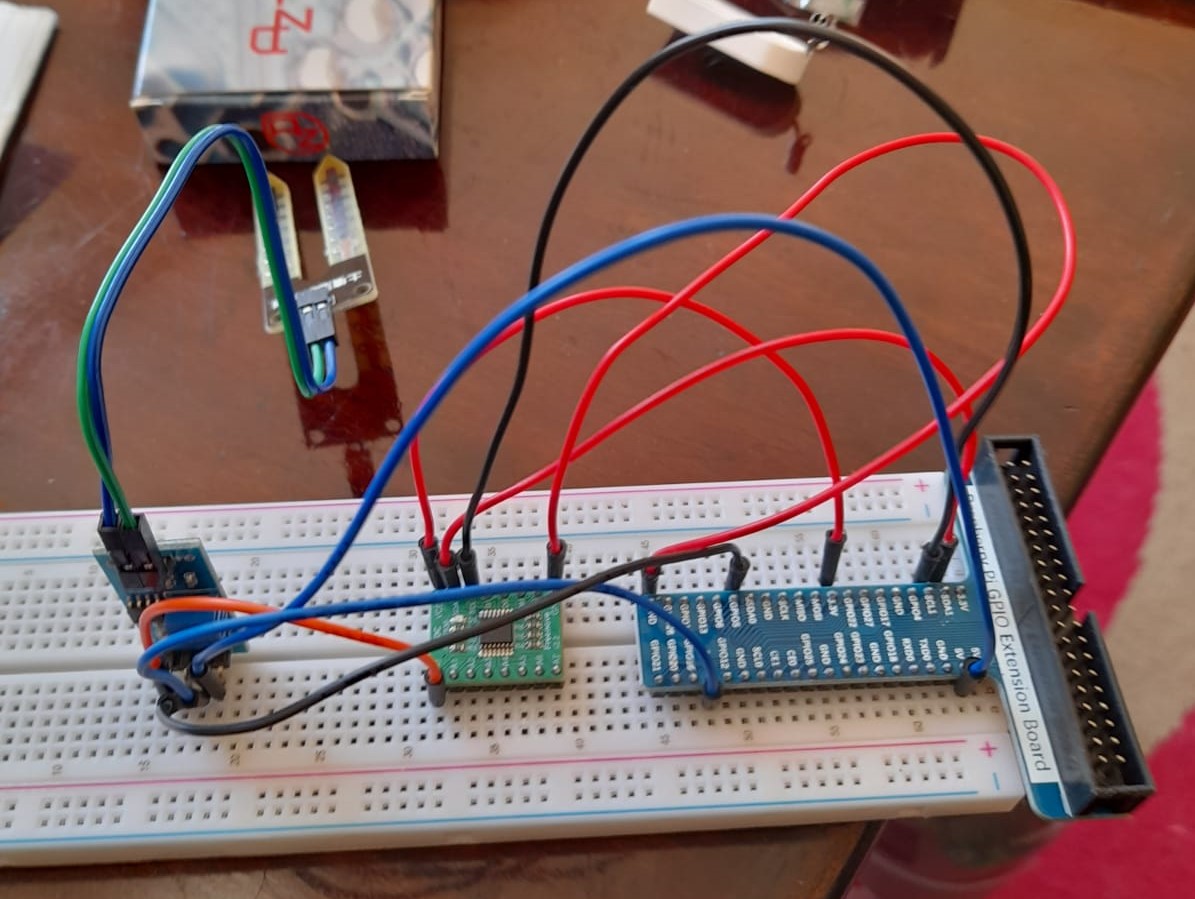
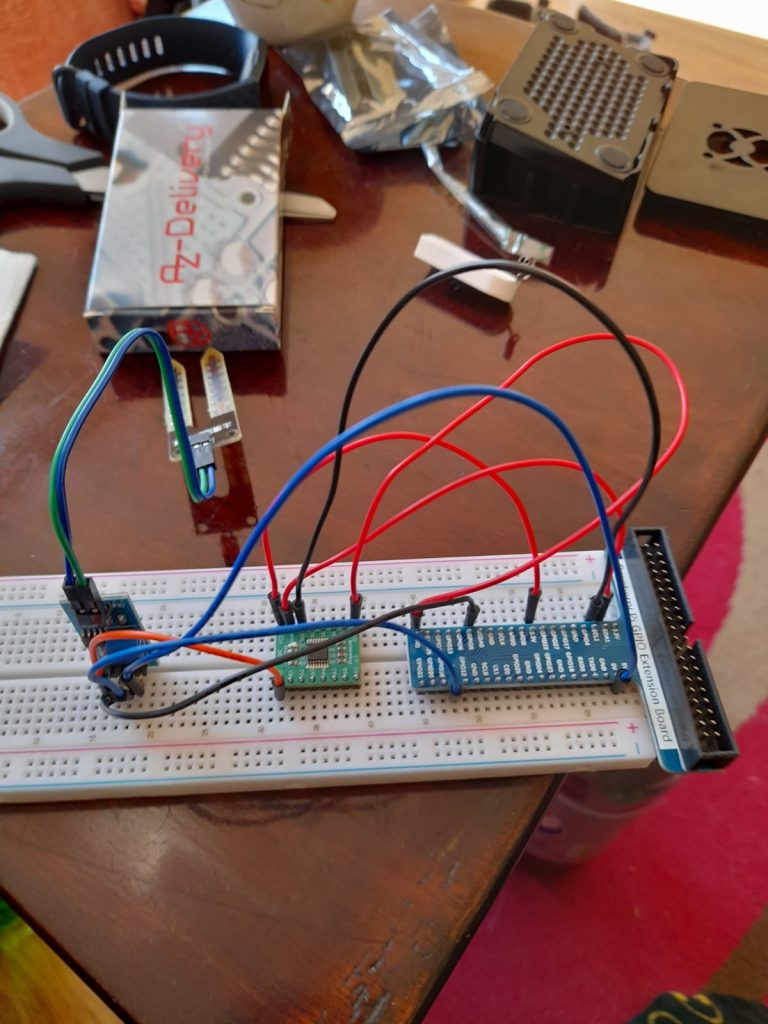
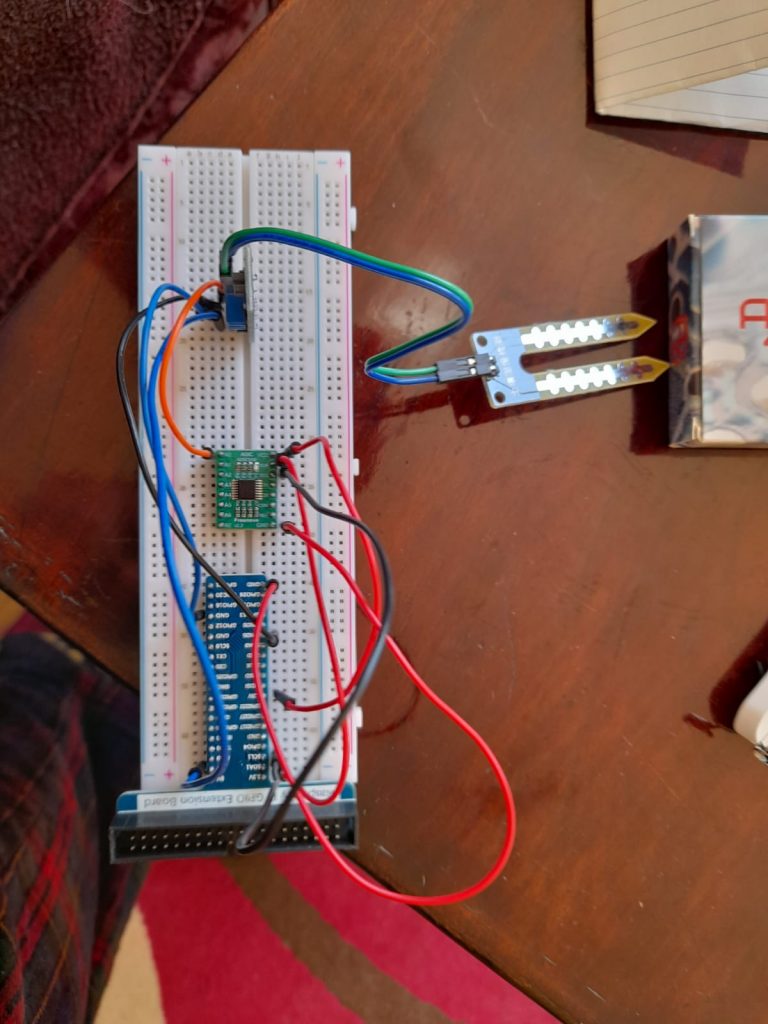
Setup:
And now I get consistent data since it’s actually reading something:
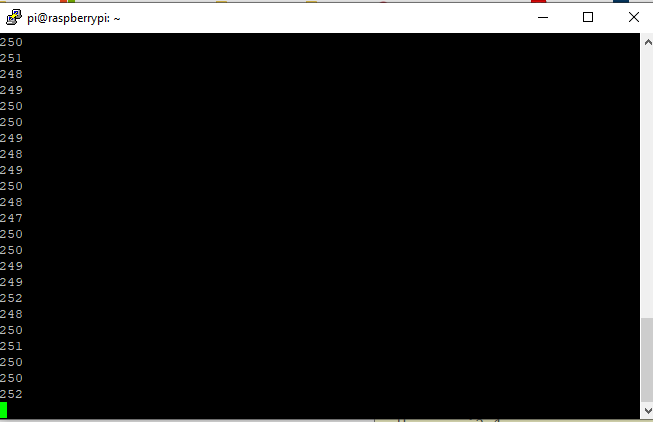
Now there’s some information lacked in Kevin’s article which was not but was obvious. The value we read is 8 bytes, so here it is near to the maximum value. He tells us that the measurement range is based on VCC and for my sensor, the output is based on VCC also. So I chose to power both with the 5V off the raspberry pi. The sensor (FC-28) outputs between 0-5V in divisions of 1028 where 0V = 0% moisture, 5V = 100% moisture OR in open air. Since for this setup I have it in open air, this is expected what we see above.
Next I need to get this data to the server, on the server, I’ll use PHP/Python to normalise my data. I don’t mind reusing curl so I’ve followed this example:
https://curl.se/libcurl/c/httpput.html
I use sprintf to format my message but in future I may just manually add my strings together as I want it to scale so it may be a for loop where it adds onto the end like “sensor1”, “sensor2” etc… because in fact I have three moisture sensors. This is what my C program ended up being:
/*===========================================================================

  example.c

  A simple program to read from an ADC using I2C communication and then transmit
  this data back up to my personal server.

  Edward Jones, April 2021.

===========================================================================*/

#include <stdio.h>
#include <fcntl.h>
#include <unistd.h>
#include <sys/ioctl.h>
#include <linux/i2c.h>
#include <linux/i2c-dev.h>
#include <sys/stat.h>
#include <curl/curl.h>

#define I2C_DEV "/dev/i2c-1"

// Device address is set to 0x48, OR-ed with the address control lines.
// If these are not connected, the address will be 0x4b (0x48 | 0x03)
#define I2C_ADDR 0x4B


int main (int argc, char **argv)
  {
  CURL *curl;
  CURLcode res;
	int count = 0;

  int i2c = open (I2C_DEV, O_RDWR);
  if (i2c >= 0)
    {
    printf ("i2c open\n");
    if (ioctl (i2c, I2C_SLAVE, I2C_ADDR) >= 0)
      {
      printf ("Device address set\n");

      // Form the command byte, which will be the same for each cycle

      int single_ended = 0x80; // bit 7 set for single-ended
      int dac_on_ref_off = 0x04; // bits 2-3 -- AD on, reference off
      int channel = 0x000; // bits 4-6 contain the channel number to sample

      int cmd = single_ended | dac_on_ref_off | channel;

      while (1)
        {

	// Write the command byte
	write (i2c, &cmd, 1);
	unsigned char data[1];
	// Read the data byte
	read (i2c, &data, 1);
	/* In windows, this will init the winsock stuff */
  	curl_global_init(CURL_GLOBAL_ALL);

  	/* get a curl handle */
  	curl = curl_easy_init();
  	if(curl) {
    	/* First set the URL that is about to receive our POST. This URL can
       just as well be a https:// URL if that is what should receive the
       data. */

    	curl_easy_setopt(curl, CURLOPT_URL, "http://www.edward-jones.co.uk/IoT/log.php");
    	/* Now specify the POST data */
	char str[1024];
	char *message_fmt = "value=%d";
	sprintf(str,message_fmt,data[0]);
	printf(str);
    	curl_easy_setopt(curl, CURLOPT_POSTFIELDS, str);

    	/* Perform the request, res will get the return code */
    	res = curl_easy_perform(curl);
    	/* Check for errors */
    	if(res != CURLE_OK)
     	fprintf(stderr, "curl_easy_perform() failed: %s\n",
     	curl_easy_strerror(res));

    	/* always cleanup */
   	curl_easy_cleanup(curl);

	//sleep
	sleep(5);
  	}
  	curl_global_cleanup();
	printf ("time: %d, data: %0d\n",count, data[0]);
	usleep (100000); // Delay 0.1 sec
	}
      }
    else
      {
      fprintf (stderr, "Can't open i2c %s\n", I2C_DEV);
      }

    close (i2c);
    }
  else
    {
    fprintf (stderr, "Can't set device address %04x\n", I2C_ADDR);
    }
  return 0;
  }
Since we use the curl library, in order to compile the command is:
gcc -o example example.c -lcurlAnd then we can run during testing (later I’ll want this to run as a background task on startup).
./exampleRight now the data is not normalised, it will send 255 for 100% and 0 for 0%. I’ll action this on the server itself since that should be relatively easy.
The php script is fairly simple and will need some work once I scale this application, for now it simply puts the raw data at the end on the data.json file and also the current value into current.json. It also normalises the data to be a percentage of 255:
<?php
$strJsonFileContents = file_get_contents("data.json");
$array = json_decode($strJsonFileContents, true);
//$array[$_GET['time']] = $_GET['value'];
$val = (((intval($_POST['value']))/255)*100);
array_push($array,$val);
$arrayb['currentvalue'] = $val;
$json = json_encode($arrayb);
file_put_contents("current.json", $json);
$jsonb = json_encode($array);
file_put_contents("data.json", $jsonb);
?>
Okay, so now the fun part, developing the android app! I learned quite a few new things during this project, I already knew about the manifest and build.gradle but now I started learning about styles.xml and making my own drawable resources as I wanted to create a nice design as well as the functionality.
I followed the standard android example for volley and built a jsonObjectRequest. I used a mixture of the two examples from the documentation:
https://developer.android.com/training/volley/simple
https://developer.android.com/training/volley/request
What was annoying was the parts it lacked, like the INTERNET permission. This article helped:
https://stackoverflow.com/questions/2169294/how-to-add-manifest-permission-to-an-application
It also lacked talking about http versus https. The example works out of the box but when you switch to a http URL it throws out an error. This is why:
My other challenge was the when you run through a loop of volley requests, it will either be too quick that it cancels the request and sends a new one, or if you use thread.sleep to control the flow then the updates won’t happen because the response function is run in the UI thread. This got me started on an approach that worked using recursion rather than a while loop:
I then placed my thread.sleep at the start of my function before any volley call. I wanted fullscreen on my app without the title bar, a mixture of the suggestions here helped to achieve this and taught me about styles.xml:
Finally I had everything almost ready, one last part, making a good UI. I simply followed this video to create my moisture meter:
And this was where I learned about drawable resources and how to create and edit them! Ultimately, this was the main Activity code I ended up with (written in Kotlin):
package com.example.myapplication

import android.os.Build
import android.os.Bundle
import android.view.Window
import android.view.WindowInsets
import android.view.WindowManager
import android.widget.ProgressBar
import android.widget.TextView
import androidx.appcompat.app.AppCompatActivity
import com.android.volley.Request
import com.android.volley.Response
import com.android.volley.toolbox.JsonObjectRequest
import com.android.volley.toolbox.Volley
import com.google.gson.Gson
import org.json.JSONException
import kotlin.math.roundToInt


data class Model(val currentvalue: Int)
class MainActivity : AppCompatActivity() {

    override fun onCreate(savedInstanceState: Bundle?) {
        super.onCreate(savedInstanceState)
        requestWindowFeature(Window.FEATURE_NO_TITLE);
        setContentView(R.layout.activity_main)

        @Suppress("DEPRECATION")
        if (Build.VERSION.SDK_INT >= Build.VERSION_CODES.R) {
            window.insetsController?.hide(WindowInsets.Type.statusBars())
        } else {
            window.setFlags(
                WindowManager.LayoutParams.FLAG_FULLSCREEN,
                WindowManager.LayoutParams.FLAG_FULLSCREEN
            )
        }

        val gson = Gson()
        val progressBar = findViewById<ProgressBar>(R.id.progressBar2)
        // Instantiate the RequestQueue.
        val contextm = this;
        //val url = "http://www.google.com"
        // ...
        val text = findViewById<TextView>(R.id.text_view_progress)

        // Instantiate the RequestQueue.
        //val queue = Volley.newRequestQueue(this)

        val url = "http://www.edward-jones.co.uk/IoT/get.php"

        // Request a string response from the provided URL.
        //val stringRequest = StringRequest(Request.Method.GET, url,
        //      Response.Listener<String> { response ->
        // Display the first 500 characters of the response string.
        //        textView.text = "Response is: ${response.substring(0, 500)}"
        //  },
        //Response.ErrorListener { error ->
        //         textView.text = error.message
        //   })

        RunRequest(progressBar,text)

        // Access the RequestQueue through your singleton class.
        //MySingleton.getInstance(this).addToRequestQueue(jsonObjectRequest)


    }
    fun RunRequest(progressBar: ProgressBar,text: TextView) {
        val urlb = "http://www.edward-jones.co.uk/IoT/current.json"
        // Initialize a new RequestQueue instance
        // Initialize a new RequestQueue instance
        try {
            Thread.sleep(4000)
        } catch (e: InterruptedException) {
            // TODO Auto-generated catch block
            e.printStackTrace()
        }
        // Initialize a new JsonObjectRequest instance
        // Initialize a new JsonObjectRequest instance
        val jsonObjectRequest = JsonObjectRequest(
            Request.Method.GET,
            urlb,
            null,
            Response.Listener { response ->
                // Do something with response
                //mTextView.setText(response.toString());

                // Process the JSON
                try {
                    val texty = response.getString("currentvalue")
                    progressBar.progress = texty.toDouble().roundToInt()
                    text.text = texty.toDouble().roundToInt().toString() + "%"
                } catch (e: JSONException) {
                    e.printStackTrace()
                }
                RunRequest(progressBar,text)
            },
            Response.ErrorListener { // Do something when error occurred
            }
        )

        // Add JsonObjectRequest to the RequestQueue

        // Add JsonObjectRequest to the RequestQueue
        Volley.newRequestQueue(this).add(jsonObjectRequest);

    }
}
And now for the finale:
In my next steps, I want to create it so it sends me a push notification to my phone when the moisture drops too low, I also want to scale my code as I said: