

As my website/blog is growing and I’m expanding to more and more projects I thought people might want to subscribe to get updates as to when a new article is available.
Unfortunately what originally looked simple started looking very complex, I thought I would just bundle this into “Part 4” of my articles following the development of the website in general but this turned out to be something all new and complicated. So let’s start by the design and architecture.
Firstly I wanted every page to have the subscribe option so naturally opted to include this as a button within my top level menu. In my still unwritten part 4 I already moved most of the menu code to exist as single files which are pulled in at load so modifying just these two files will apply to the whole website.
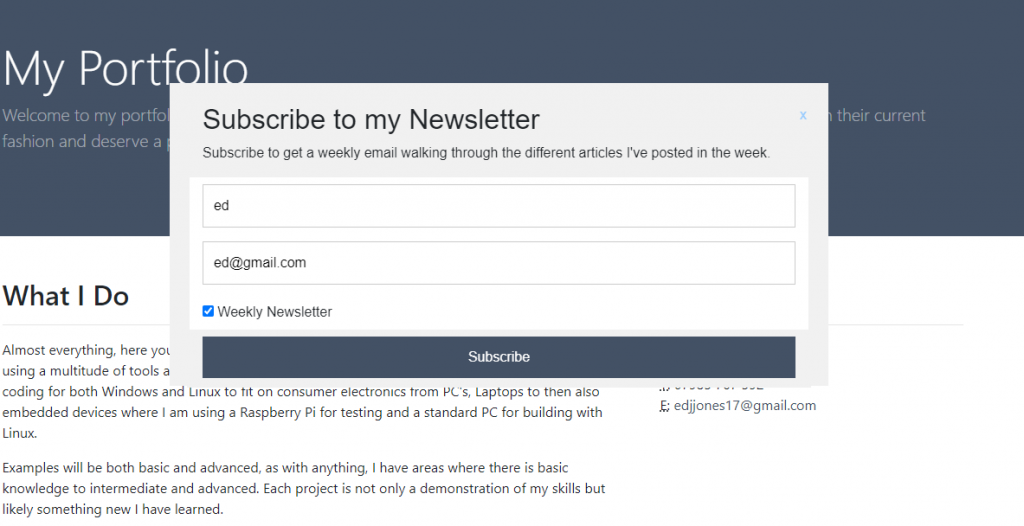
What I wanted is a pop up which would show when the subscribe button is clicked, have a close option and of course, my form in a nice style. To get started, I created a simple div:
<div class="subscribe" id="subscribe">
Here!
</div>
I created some simple css to hide the div:
.subscribe{
	position:fixed;
	top:20%;
	left:30%;
	height:0%;
	width:0%;
	display:none;

  	background-color: #fff;
}
I selected position:fixed so that it will travel with the view as someone scrolls. I took the example here:
I started with this by adding to my menu:
<li class="nav-item">
     <a class="nav-link" href="javascript:void(0);" onclick="myFunction();">Subscribe</a>
</li>
I then added to my javascript code the function:
function myFunction(){
            // Animate the div element. A duration is set to 500 milliseconds.
            $("#subscribe").animate({ width: '40%', height: '350px' }, 300);
            $('#subscribe').show();          // Also show the div element.
}
The next part was to populate my div with the subscribe form and give it a nice look and feel, I really liked the simplicity of the W3 schools example so simply incorporated this approach. Since overriding the input form styles might cause issues with my contact page form I incorporated these into classes instead in CSS and then applied them that way. I also changed the colour of the button to match my main heading background colour.
https://www.w3schools.com/howto/howto_css_newsletter.asp
The final part was creating the cross at the top right. This was relatively simple really, I used this approach with some modifications to match my setup of course:
I also applied the close:hover suggested here:
https://stackoverflow.com/questions/19704477/adding-close-button-in-div-to-close-the-box
So still some things to do:
- Validate the user input
- Send to PHP
The user input validation I simply copied and pasted my code from my contact page. This is also a need for my article Part 4 as it would be documented there. Here is the code:
function validateEmail(email) {
    const re = /^[^\s@]+@[^\s@]+\.[^\s@]+$/;

    return re.test(String(email).toLowerCase());
}

$("#sub").submit(function( event ) {
	event.preventDefault();
	//Verify inputs
	if(validateEmail($('#email').val())){
	    var value = $("#name").val();
            if (value === "" || value == "please enter your name"){
                alert("Please enter your name");
            }else{

                    $.post('./php/subscribe.php', $('#sub').serialize(), function(response) {
                        // Log the response to the console
                        $('#subscribe').hide();
			$('#subscribe').width("0%");
			$('#subscribe').height("0%");
			console.log(response);
                    });

            }
	}else{
	    alert("Please enter a valid email");
	}
});
I found I had to preventDefault to avoid the form refreshing the page based off this stackoverflow question:
https://stackoverflow.com/questions/19454310/stop-form-refreshing-page-on-submit
I knew to override the submit function via:
https://api.jquery.com/submit/
The next step is to then create my mySQL table, I went with a table including the name, email, subscription date (todays date) and whether they are subscribed:
CREATE TABLE subscribers (name VARCHAR(30), email VARCHAR(30), subscribe BOOLEAN, subscribed DATE);
Now I had my table I used this simple implementation:
https://www.tutorialrepublic.com/php-tutorial/php-mysql-insert-query.php
Given I was using a boolean I double checked it all by this link: https://www.mysqltutorial.org/mysql-boolean/
To get todays date I used this post:
And hey presto, I arrived at this code:
<?php
$link = mysqli_connect("localhost", "root", "", "MyContent");

// Check connection
if($link === false){
    die("ERROR: Could not connect. " . mysqli_connect_error());
}
$sub = "false";
if($_POST['subscribe'] == "on"){
	$sub = "true";
}
 $nowFormat = date('Y-m-d H:i:s');
// Attempt insert query execution
$sql = "INSERT INTO subscribers (name, email, subscribe, subscribed) VALUES ('" . $_POST['name'] . "', '" . $_POST['mail'] . "', " . $sub . ", '" . $nowFormat . "')";
if(mysqli_query($link, $sql)){
    echo "Records inserted successfully.";
} else{
    echo "ERROR: Could not able to execute $sql. " . mysqli_error($link);
}

// Close connection
mysqli_close($link);
?>
So now here comes the slightly more complex part. Looking at this post:
https://www.wpbeginner.com/wp-tutorials/how-to-add-email-subscriptions-for-your-wordpress-blog/
It recommends using third party tools which I wasn’t too keen on, I like to build and control it myself if possible, it expands my knowledge and I know precisely what’s going on and how to fix it. The other issue is that I’m self hosting, so I need to setup SMTP. However I did like the articles point about not over spamming and instead to have a weekly newsletter so that is what I’ll opt for.
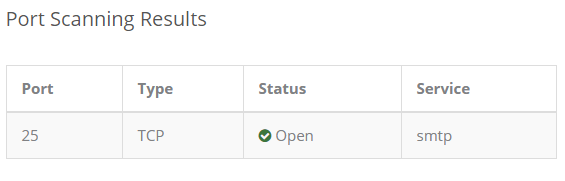
Next I setup SMTP on my server by following this article:
I was slightly worried that port 25 might be blocked but turns out Kamatera do not block it so that worked all fine:
Funnily enough I didn’t consider this aspect of the contact page when migrating. Now this is set up that form should work again on emailing me with any questions people have, I tested it with a simple script running the mail function. But ultimately anything sent to not me better have a nice format and for that, I’d like to use HTML templates. With that in mind, I found this article:
To create my HTML Templates I used a simple tool:
https://designmodo.com/email-newsletter-templates/
Creating this as my joining email:
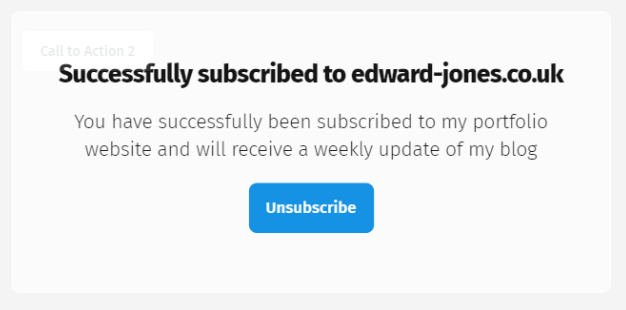
Now I do need to create my unsubscribe function, but first let’s finish up the intro email. I’ll need to embed specifically into my unsubscribe button a post in the url of the email in question. So I split my html file into two parts and embed this in between where the split is the url for the button, like so:
$to = $_POST['mail'];

$subject = 'Successfully subscribed to edward-jones.co.uk';

$headers = "From: admin@edward-jones.co.uk\r\n";
$headers .= "MIME-Version: 1.0\r\n";
$headers .= "Content-Type: text/html; charset=ISO-8859-1\r\n";
$message = file_get_contents("../templates/header_sub.html");
$message .= $_POST['mail'];
$message .= file_get_contents("../templates/footer_sub.html");
mail($to, $subject, $message, $headers);
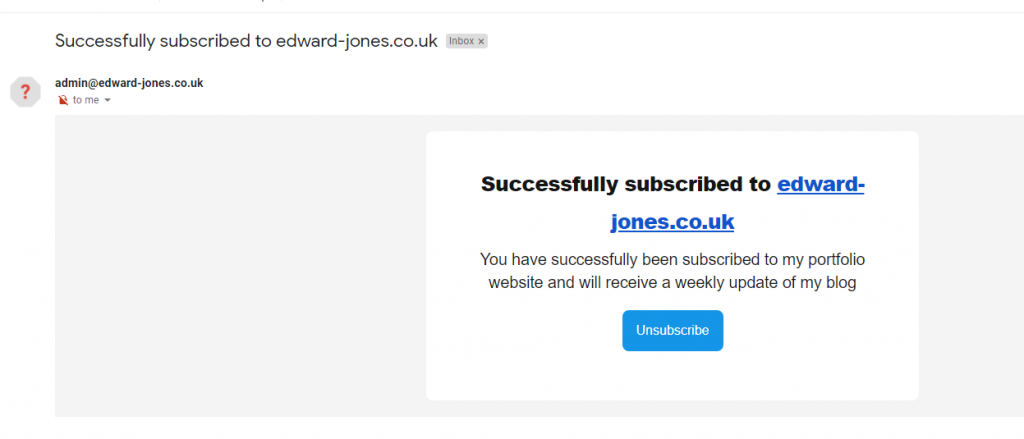
It also makes it more readable and manageable with my templates to store them in their own files. Hey presto, we’ve got the email!
I also saw a nice simple design for the weekly posts so I’ll be using that as well:

We’ll get to that soon. Let’s quickly create the unsubscribe page now. Using previous code I quite simply created this code as my unsubscribe.php:
<?php
$link = mysqli_connect("localhost", "root", "3Dzwftjb", "MyContent");

// Check connection
if($link === false){
    die("ERROR: Could not connect. " . mysqli_connect_error());
}

$sql = "DELETE FROM subscribers WHERE email = '" . $_GET['email'] . "'";
if(mysqli_query($link, $sql)){
    echo "Unsubscribed successfully. Sorry to see you go, come back soon!";
} else{
    echo "ERROR: Could not able to execute $sql. " . mysqli_error($link);
}

// Close connection
mysqli_close($link);

?>
Checking my mysql code beforehand with:
https://stackoverflow.com/questions/19085022/php-mysql-delete-where-values-are-equal-to/19085158
So that’s almost everything! We have a way for users to subscribe and unsubscribe to receive weekly updates. Almost everything anyway… Two bits left, firstly, I noticed that when I went to deployment I would have a bit of a time updating each page. Modularity had to be done. I have already moved the universal menu javascript functions to their own file. Like with my email template I then moved my html code that was universal into their own html pages and used the following line to insert them at runtime:
<?php echo file_get_contents("./templates/menu.html"); ?>And of course, I moved the css too. Now this would be three line updates across each page.
I also noticed on my email from my subscription that there was preheader text. This simple trick into my template fixes that:
https://stackoverflow.com/questions/32888872/how-to-define-html-email-preheader
Instead of a span I opted for a div as per this article:
https://www.activecampaign.com/blog/email-preheader
Okay so now the final part. What I want to do is send out an automated email each week on a Friday afternoon which grabs my latest articles from within the last 7 days and dumps them into the template I showed earlier then sending this out to every email in my subscription list.
So the first part is to get the last 7 days worth of posts. I took an excerpt from my index page and grab 4 post. Then I used this method to extract the new ones:
https://stackoverflow.com/questions/14370018/checking-if-a-date-is-within-7-days-of-the-current-time
Ending up with this, I get the following code and am ready to render my email:
<?php
$json = file_get_contents('http://www.edward-jones.co.uk/blog/wp-json/wp/v2/posts?per_page=4');
$posts = json_decode($json);
   foreach ($posts as $p) {
	if( strtotime($p->date) > strtotime('-7 day') ) {
    		echo $p->date;
	}
   }
?>
Now taking my last weeks blog example and applying it seemed to be the most difficult part. Within each piece was 6 pieces, 3 repetitions of the link to the article, then the image, title and some text. How is best to embed this into a html template? Well, this seemed the best:
https://stackoverflow.com/questions/45032803/php-sprintf-html-template
It worked really well, now I needed to figure out the rest of the html. I also don’t post 4 articles per week normally so needed to catch that and only show 2 posts if needed or rather just one row. The other thing was to not send out an article at all if I didn’t post that week. Anyway, first things first, I noticed that each item exists as a div. So I stored that div in a html file, performed a file_get_contents and then:
$format = file_get_contents("../templates/div_blog.html");
$l = $posts[1];
$link = "http://www.edward-jones.co.uk/article.php?id=" . $l->id;

$patterns = array(
        '/{link}/',
        '/{image}/',
        '/{title}/',
        '/{body}/',
    );
    $replacements = array(
        $link,
        $l->featured_image->size_thumbnail,
        $l->title->rendered,
        $l->excerpt->rendered,
    );
$body = preg_replace($patterns, $replacements, $format);
So now I can populate divs for a certain post. A good function to start with. When I collapse these divs I get this:
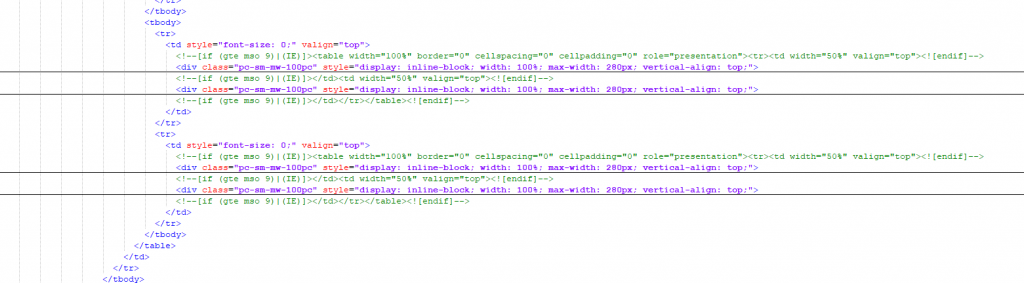
After much playing around I managed to get this:
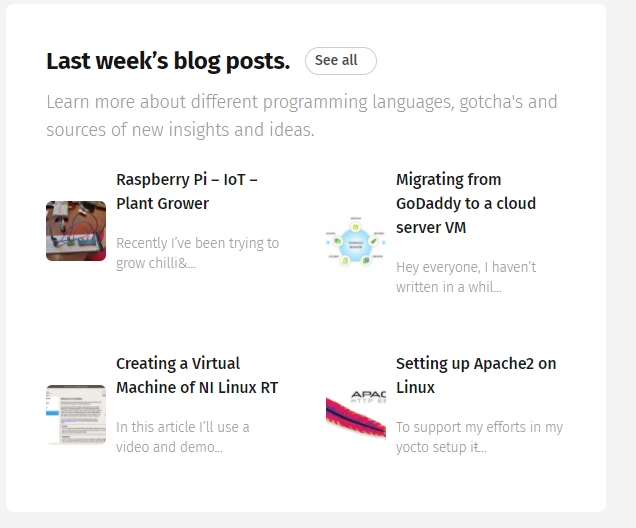
Yay! Finally, the email template I want. So this was my test php file to generate the body:
<?php
$json = file_get_contents('http://www.edward-jones.co.uk/blog/wp-json/wp/v2/posts?per_page=4');
$posts = json_decode($json);
$count = 0;
$body = file_get_contents("../templates/weekly_header.html");
$body .= '<tr><td style="font-size: 0;" valign="top"><!--[if (gte mso 9)|(IE)]><table width="100%" border="0" cellspacing="0" cellpadding="0" role="presentation"><tr><td width="50%" valign="top"><![endif]-->';
$format = file_get_contents("../templates/div_blog.html");
foreach ($posts as $p) {
        if( strtotime($p->date) > strtotime('-7 day') ) {
		if($count == 2){
			$body .= "</td></tr>";
			$body .= '<tr><td style="font-size: 0;" valign="top"><!--[if (gte mso 9)|(IE)]><table width="100%" border="0" cellspacing="0" cellpadding="0" role="presentation"><tr><td width="50%" valign="top"><![endif]-->';

		}
		$link = "http://www.edward-jones.co.uk/article.php?id=" . $p->id;

		$patterns = array(
        		'/{link}/',
        		'/{image}/',
        		'/{title}/',
        		'/{body}/',
    		);
    		$replacements = array(
       		 	$link,
      		  	$p->featured_image->size_thumbnail,
   		     	$p->title->rendered,
 		       	(substr($p->excerpt->rendered,0,50) . "..."),
 	   	);
		$body .= preg_replace($patterns, $replacements, $format);
 	       $count++;
	}
}
$body .= "</td></tr>";
$body .= file_get_contents("../templates/weekly_footer.html");
echo $body;
?>
I managed to get this into my inbox:

With the final code:
<?php
$json = file_get_contents('http://www.edward-jones.co.uk/blog/wp-json/wp/v2/posts?per_page=4');
$posts = json_decode($json);
$count = 0;
$body = file_get_contents("../templates/weekly_header.html");
$body .= '<tr><td style="font-size: 0;" valign="top"><!--[if (gte mso 9)|(IE)]><table width="100%" border="0" cellspacing="0" cellpadding="0" role="presentation"><tr><td width="50%" valign="top"><![endif]-->';
$format = file_get_contents("../templates/div_blog.html");
$count = 0;
foreach ($posts as $p) {
if( strtotime($p->date) > strtotime('-7 day') ) {
		$count++;
		if($count == 2){
			$body .= "</td></tr>";
			$body .= '<tr><td style="font-size: 0;" valign="top"><!--[if (gte mso 9)|(IE)]><table width="100%" border="0" cellspacing="0" cellpadding="0" role="presentation"><tr><td width="50%" valign="top"><![endif]-->';

		}
		$link = "http://www.edward-jones.co.uk/article.php?id=" . $p->id;

	$patterns = array(
        	'/{link}/',
        	'/{image}/',
        	'/{title}/',
        	'/{body}/',
    	);
    	$replacements = array(
        	$link,
        	$p->featured_image->size_thumbnail,
        	$p->title->rendered,
        	(substr($p->excerpt->rendered,0,50) . "..."),
    	);
	$body .= preg_replace($patterns, $replacements, $format);
$count++;
	}
}
$body .= "</td></tr>";
$body .= file_get_contents("../templates/weekly_footer.html");
if($count > 0){
$link = mysqli_connect("localhost", "root", "", "MyContent");

// Check connection
if($link === false){
    die("ERROR: Could not connect. " . mysqli_connect_error());
}
$sql = "SELECT * FROM subscribers";

$subject = 'Your weekly update from edward-jones.co.uk!';

$headers = "From: admin@edward-jones.co.uk\r\n";
$headers .= "MIME-Version: 1.0\r\n";
$headers .= "Content-Type: text/html; charset=ISO-8859-1\r\n";
$message = $body;

if (!$result = $link->query($sql)) {
    die ('There was an error running query[' . $connection->error . ']');
}else{
while ($row = $result->fetch_assoc()) {
    $to = $row["email"];}
    mail($to, $subject, $message, $headers);
}
// Close connection
mysqli_close($link);
}
?>
And now finally I used crontab to set this to run every week. In crontab with “crontab -e” in terminal, I added to the file:
5 9 * * 1 /usr/bin/php /var/www/public_html/php/weekly.php
And there we go! A subscribe system which automatically sends every week. If there is no articles, it won’t send at all, so all works as I want.