
Okay so recently I was writing up a article on how to update the MARTe2 interface for HTTP and I was doing this by directly modifying the Resources/HTTP page however a few things happened while I was slowly writing up this article:
- I spent some time with my friends who are heavily into front end and realised I am absurdly behind on more modern web technologies.
- I also realised that if you do it this way you are limited to hosting one HTTP Server/service per MARTe2.
- Alongside this limitation I’m fairly certain the MARTe2 application is simply providing a plain text html response when it receives a request so as a HTTP Service, it’s not really one, it’s more like a wget interface with a background REST API that it uses with javascript to grab data.
So I’ve turned my attention into a more in depth project where I’m focused on a few things but ultimately want to deliver a viable product that could be useful for a wide majority of the community using MARTe2. Here is what I’ve come up with as my list of requirements:
- Use Angular with Node.js to provide the user with dashboards that they can design.
- Use Rasken to provide Angular with a datasource from MARTe2’s REST API.
- Use Salt to remotely trigger actions on minion nodes within the Web UI – this will typically be, run MARTe2 application with config or reboot the system.
- Host a user login system which uses MySQL, if a user is to add users/modify components of a user, it should use a procedure to authenticate the admin user prior to allowing them to make changes to avoid security issues through SQL Injection.
- Use bootstrap to build up a very simple UI Menu – it will simply have dashboards on the left, a settings cog button on the right and then a Login/Logout button.
- Settings will allow users to add/remove systems and to control them and upload new configuration files which maintain their unique name, when you select to run MARTe2 you are then presented with the list of configurations on the remote system.
Quite a list of requirements that this will probably take more than one article and so we may have this split into sections. A future use I’d also like to provide here is exposing our python libraries as javascript objects so users can build up configurations in the interface. The tricky part would be having it interpret the config file back to objects as well afterwards, so the configuration file is the file, not some intermediate layers to it.
Let’s start with the easy part. The bootstrap nav bar. But before we can do any of that, knowing what we need later we should first setup our Apache server correctly. I found this article which bundled this all together nicely:
So I didn’t change my apache2 configuration as this broke things, we’ll hopefully learn why that is later.
But this is where the first complications happened, trying to identify a way to get ASP.NET running well on apache2 on an ubuntu server. Let’s face that later anyway and just need with the navigation panel and start simple.
Creating the bootstrap actually proved to be more tedious than I originally thought. Initially I went with deciding on a theme, but later I think I’ll open that up further and allow the user to simply change it when they want to. For now, I opted for:
https://bootstrap.themes.guide/herbie/
After some tinkering with the UI classes, lessons learned being:
- ml-auto, mr-auto both mean, margin-left and margin-right accordingly.
- I had to add padding to my main class so it didn’t underlap with the navigation bar. I used mr-auto to get the buttons to align to the right for settings and login.
- For the login functionality I used a few sources to put together something where I had these main functions that I shall walk through next – however I might try and reconfigure this to use PAM for authentication so it matches with my Salt REST API setup.
For me the intent is a simple UI so this was what each page started out with:
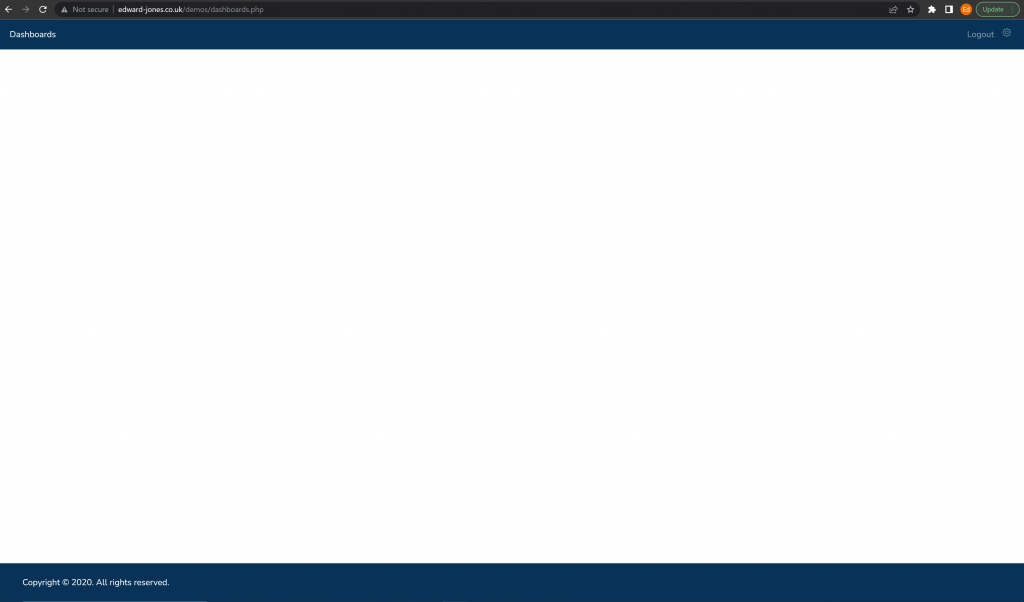
So now I duplicated this page several times over and ensured I had the following pages:
- dashboards.php
- login.php
- settings.php
- index.php
- logout.php
Wary of user access I avoided any PHP examples which were inherently susceptible to SQL injection.
The first part I needed was to enforce users not to be able to navigate to a page without authentication so other than the logout.php and login.php, each page starts with the following:
<?php
// We need to use sessions, so you should always start sessions using the below code.
session_start();
// If the user is not logged in redirect to the login page...
if (!isset($_SESSION['loggedin'])) {
        header('Location: login.php');
        exit;
}
?>
For your curiosity, here is the basic CSS and HTML setup with jQuery:
<html>
<head>
    <style>
        .sub {
        float: right;
        float: top;
        position:relative;
        }
    </style>
    <script src="https://ajax.googleapis.com/ajax/libs/jquery/3.6.0/jquery.min.js"></script>
<link href="https://maxcdn.bootstrapcdn.com/bootstrap/4.3.1/css/bootstrap.min.css" rel="stylesheet">
<link href="https://cdnjs.cloudflare.com/ajax/libs/ionicons/3.0.0/css/ionicons.css" rel="stylesheet">

<link rel="stylesheet" href="theme.css" crossorigin="anonymous">

</head>
<body class="d-flex flex-column min-vh-100">
<nav class="navbar fixed-top navbar-expand-lg navbar-dark bg-primary">
            <div class="collapse navbar-collapse justify-content-center" id="collapsingNavbar">
                <ul class="navbar-nav">
                    <li class="nav-item active">
                        <a class="nav-link" href="dashboards.php">Dashboards<span class="sr-only">(current)</span></a>
                    </li>
                </ul>
                <ul class="navbar-nav ml-auto">
                    <li class="nav-item">
                        <a class="nav-link" href="logout.php">Logout</a>
                    </li>
                    <li class="nav-item">
<a class="nav-link float-right" href="settings.php">
                <svg xmlns="http://www.w3.org/2000/svg" width="16" height="16" fill="currentColor" class="bi bi-gear" viewBox="0 0 16 16">
  <path d="M8 4.754a3.246 3.246 0 1 0 0 6.492 3.246 3.246 0 0 0 0-6.492zM5.754 8a2.246 2.246 0 1 1 4.492 0 2.246 2.246 0 0 1-4.492 0z"></path>
  <path d="M9.796 1.343c-.527-1.79-3.065-1.79-3.592 0l-.094.319a.873.873 0 0 1-1.255.52l-.292-.16c-1.64-.892-3.433.902-2.54 2.541l.159.292a.873.873 0 0 1-.52 1.255l-.319.094c-1.79.527-1.79 3.065 0 3.592l.319.094$
</svg>
</a>
                    </li>

                </ul>
            </div>
        </nav>

  <div
    class="d-flex flex-column mt-auto flex-md-row text-center text-md-start justify-content-between py-4 px-4 px-xl-5 bg-primary">
    <!-- Copyright -->
    <div class="text-white mb-3 mb-md-0">
      Copyright © 2020. All rights reserved.
    </div>
    <!-- Copyright -->

  </div>

</body>
</html>
So now it was a matter of creating the login.php page, for the design I found upon this:
https://mdbootstrap.com/docs/standard/extended/login/
This presented some great examples and after removing and moving some things around I had a login I liked:

For the login php scripts themselves, this article presented itself as a good solution:
https://codeshack.io/secure-login-system-php-mysql/
Note that PASSWORD didn’t match the password_verify function, instead I had to regenerate my password hash with just the hash PHP function.
My next part was then starting to create the settings PHP file. Due to this being more bespoke and having obvious credentials in it I’ll limit the code slightly but this is where I’m up to with this:

The code here autogenerates, it identifies the users by iterating from the accounts table all rows and populates a bootstrap row for each with bootstrap form styles. I’ll show this code shortly but don’t have the functionality ironed out yet. For now, the PHP simply echo’s the rows and the wrapping css and html around them:
<div class="container avoid-nav">
       <div id="Systems" class="row flex-xl-nowrap">
          <h3>Systems:</h3>
      </div>
      <div class="row">
<div class="progress progress-striped active">
  <div class="bar" style="width: 40%;"></div>
</div>
       </div>
       <div id="Users" class="row flex-xl-nowrap">
          <h3>Users:</h3><div class="ml-auto col-md-2"><button class="btn btn-outline-dark">+</button></div>
       </div>
              <div class="row">
<div id="Username" class="col-md-3">
<label class="col-md-3 col-form-label form-control-label text-muted">Username</label>
</div>
<div id="Password" class="col-md-3">
<label class="col-md-3 col-form-label form-control-label text-muted">Password</label>
</div>
<div id="User Level" class="col-md-4">
<label class="col-md-4 col-form-label form-control-label text-muted">User Level</label>
</div>

              </div>

<?php
// Change this to your connection info.
$DATABASE_HOST = 'localhost';
$DATABASE_USER = '***********';
$DATABASE_PASS = '***********';
$DATABASE_NAME = '***********';
// Try and connect using the info above.
$con = mysqli_connect($DATABASE_HOST, $DATABASE_USER, $DATABASE_PASS, $DATABASE_NAME);
if ( mysqli_connect_errno() ) {
        // If there is an error with the connection, stop the script and display the error.
        exit('Failed to connect to MySQL: ' . mysqli_connect_error());
}

// Prepare our SQL, preparing the SQL statement will prevent SQL injection.
$result=mysqli_query($con,"SELECT * FROM accounts");
while($row=mysqli_fetch_array($result))
{
    echo '<div class="row">';
    echo '<div id="Username" class="col-md-3">';
    echo '<input type="textbox" value="' . $row['username'] . '" class="form-control" disabled></div>';
    echo '<div id="Password" class="col-md-3"><button type="button" id="change" class="btn btn-outline-dark"';
    if($_SESSION['level'] == "Maintainer" OR $_SESSION['level'] == "owner" OR $_SESSION['name'] == $row['username']){
       echo '>Change password</button></div>';
    } else {
       echo ' disabled>Change password</button></div>';
    }
    echo '<div id="User Level" class="col-md-3">';
    if($_SESSION['level'] == "Maintainer" OR $_SESSION['level'] == "owner"){
        echo '<select id="levels" name="levels" class="form-control">';
    } else {
        echo '<select id="levels" name="levels" class="form-control" disabled>';
    }
    if($row['level'] == "Guest"){
          echo '<option value="Guest" selected>Guest</option>';
    }
    else {
          echo '<option value="Guest">Guest</option>';
       if($row['level'] == "Developer"){
           echo '<option value="Developer" selected>Developer</option>';
       } else {
           echo '<option value="Developer">Developer</option>';
           if($row['level'] == "Maintainer"){
                echo '<option value="Maintainer" selected>Maintainer</option>';
           } else {
                echo '<option value="Maintainer">Maintainer</option>';
                if($row['level'] == "owner"){
                     echo '<option value="Owner" selected>Owner</option>';
                } else {
                     echo '<option value="Owner">Owner</option>';
                }
           }
       }
    }
    echo '</select>';
    echo '</div>';

    echo '<div class="col-md-3">';
    echo '<button class="btn btn-outline-danger"';
    if($_SESSION['level'] != "owner"){
         echo ' disabled';
    } else {
         if($_SESSION['name'] == $row['username']){
              echo ' disabled';
         }
    }
    echo '>Delete</button></div>';
    echo '</div>';
}
?>
</div>
So this is how it populates that section, but again, for now, the overall functions aren’t running. I began moving onto setting up salt but still am undecided on how to run this up so to distract myself from this infuriating situation I have circled back and will now try to handle the Angular side of things.
The biggest challenge it seems is that Angular is ASP.NET built with mostly Visual Studio. At least that’s what I thought anyway based on the article I was following I found here:
But before we delve even further into that I think this is a good place to close down this article as a part 1, I’ve done part functionality for both the Salt and Angular components and realizing how large this article would get as one complete blog post I’m closing down at this stage this article. The defining part of this article piece was:
- Deciding on functionality and a professional design as well as the user experience.
Now something finally I’ve been playing with was of course the user account handling. The final parts was to create the functionality to allow the user to change password or to create a new user as mentioned. I need to keep it secure so I decided to store the users login details when they login and then to add those to any jQuery requests so the user is re-authenticated on the PHP end whenever they try and make any big changes to the user table.
So this final part I create my new div for the add user form:
<div class="changeuser-form" id="adduser" style="display:none;height:50%;">
<button type="button" class="cbutton"><span class="sr-only">Close</span></button>
<div class="container form-group row" style="padding-left:2rem;padding-right:2rem;">
        <label class="col-md-50 col-form-label form-control-label text-muted">Username:</label>
                <input class="col-md-50 form-control" id="username" type="text" value="Guest">
</div>
<div class="container form-group row" style="padding-left:2rem;padding-right:2em;">
        <label class="col-md-50 col-form-label form-control-label text-muted">Password:</label>
        <input class="form-control col-md-50" type="password" id="password" value="Guest">
</div>

<div class="container form-group row" style="padding-left:2rem;padding-right:2em;">
        <label class="col-md-50 col-form-label form-control-label text-muted">Confirm Password:</label>
        <input class="form-control col-md-50" type="password" value="Guest" id="cpassword">
</div>

<div class="container form-group row" style="padding-left:2rem;padding-right:2em;">
        <label class="col-md-50 col-form-label form-control-label text-muted">Level:</label>
        <select id="levels" name="levels" class="form-control" id="levels"><option value="Guest" selected="">Guest</option><option value="Developer">Developer</option><option value="Maintainer">Maintainer<>
</div>


<div class"container form-group row" style="padding-left:45%;padding-right:45%">
<button id="newuser" class="btn btn-outline-dark">Update</button>
</div>
</div>
Quite simple really, my jQuery then looks like this for now:
    $('#adduse').click( function() {
        $('#adduser').show();
    });

    $('#newuser').click( function() {
        $.ajax({
              type: "POST",
              url: "api/newuser.php",
              data: {"username":$("#username").value,"password":$("#password").value,"level":$("#levels").value,"whoami":<?php echo $_SESSION['name'];?>,<?php echo $_SESSION['password'];?>},
              success: function(data){

              }
       });

    });
Not an extremely secure way, embedding the password into the request but as a hash so as to offer some protection.
You’ll notice I am taking on a new tactic, with this, api folder. My plan is that I want 1 PHP file which services all my REST functions, i.e. An Actual REST API! Without also creating hundreds of individual PHP files as it was starting to get a bit complicated anyway. Later we’ll migrate things but for now, let’s just get our own function working. First, I create the directory under demo’s for api and then I write a .htaccess file within that directory for this:
<IfModule mod_rewrite.c>
  RewriteEngine On
  RewriteBase /demos/api
  RewriteRule ^functions\.php$ - [L]
  RewriteCond %{REQUEST_FILENAME} !-f
  RewriteCond %{REQUEST_FILENAME} !-d
  RewriteRule . functions.php [L]
</IfModule>
Now with this, it tells Apache2 to forward any request for an unknown file in this directory to /demos/api/functions.php. So now I just need to create my functions.php and as a simple first pass test I program it to just echo “Here”:
<?php
echo "Here";
?>
And hey presto:
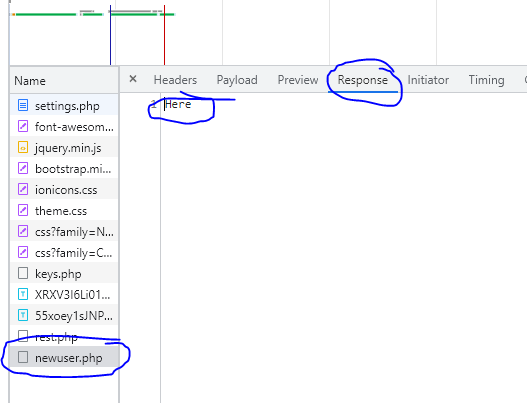
Great, so any function will be identified by the “php” file that is requested to the api directory. i.e. since my jquery put in a POST request for newuser.php, then that is the function we’re calling.
To figure out our function, first we can use $_SERVER[‘REQUEST_URI’] and then we split the string and take the last string where we split by “/” and then do this again but take the first string and split by “.” to get our function name.