
So we’re onto the home stretch, we have a few things to wrap up:
- HTML content rendered by a angular variable not displaying correctly.
- Contacts page needs creating
- New component for the comments section
Let’s start with the easiest, HTML content, this was actually much easier to solve than I thought. It turned out my rendering method was wrong. I found this article:
https://blog.briebug.com/blog/how-do-i-display-html-inside-an-angular-binding
And where I needed this, simply doing [innerHTML]=”variable_name”, solved this issue.
Once I implemented this across the board, albeit in some places I had to place dummy div tags just to get something to be able to inject innerHTML into, it worked a charm and we’re one step closer to matching the original website mock up.
Note: where I had existing HTML with embedded variables of content, I generated the whole HTML string as a variable in the typescript and then embedded that completely in the innerHTML.
So, with that now solved with some back and forth let’s move onto the comments component. This sub-component will be useful as it will allow us to see how we should interact with a service when sending data back – i.e, posting a comment. We’ll continue to use our WordPress service for this one but note that our contact page will require it’s own service, we’ll call this service viewerService.
So anyway let’s go ahead and generate our new comments component:
ng generate component commentIt took a while to get this working, I did all the processes’ we’ve seen so far, but what tripped me up was my ngFor loop started in a div I immediately closed as this was the breaker for the comment section, I needed to wrap it into a larger dummy div similar to for articles solution mentioned above.
I then got tricked up by a silly mistake I made, sometimes the build output isn’t so helpful although it was actually trying to tell me what I did wrong in the first error but googley eyes made me not see it.
Similar to before, we also needed to use the innerHTML for rendered content. So now I end up with this setup:
Okay so the second to final part is applying my styles specific to the comment section to the style.css for the comment component. This isn’t too difficult, just a simple copy and paste again.
This is where I also realized that I hadn’t done this for the article component as well so at the same time I pushed this across.
Thankfully I put all my comment CSS and JavaScript into a templates HTML file and so this functionality is all consolidated into one file to read. With that, after copying and pasting the CSS styles into their respective components I have the JavaScript to migrate:
$(document).ready(function(){
$.urlParam = function(name){
        var results = new RegExp('[\?&]' + name + '=([^&#]*)').exec(window.location.href);
        if (results == null){
           return null;
        }
        else {
           return decodeURI(results[1]) || 0;
        }
    }


    $('#submitbutton').click(function() {
        var author = $('#aname').val();
        var comment = $('#comment').val();
        var email = $('#email').val();
        $.post('http://www.edward-jones.co.uk/blog/wp-json/wp/v2/comments',
        {
            author_name: author,
            author_email: email,
            content: comment,
            post: $.urlParam('id')
        }, function(data, status){
            if(status){
                alert("Thank you for your comment! Unfortunately due to spammers I have limited comments to require approval, your comment will be viewable once approved, have a nice day!");

            }else{
                alert("Oops, something went wrong!");
            }
        });
    });
});
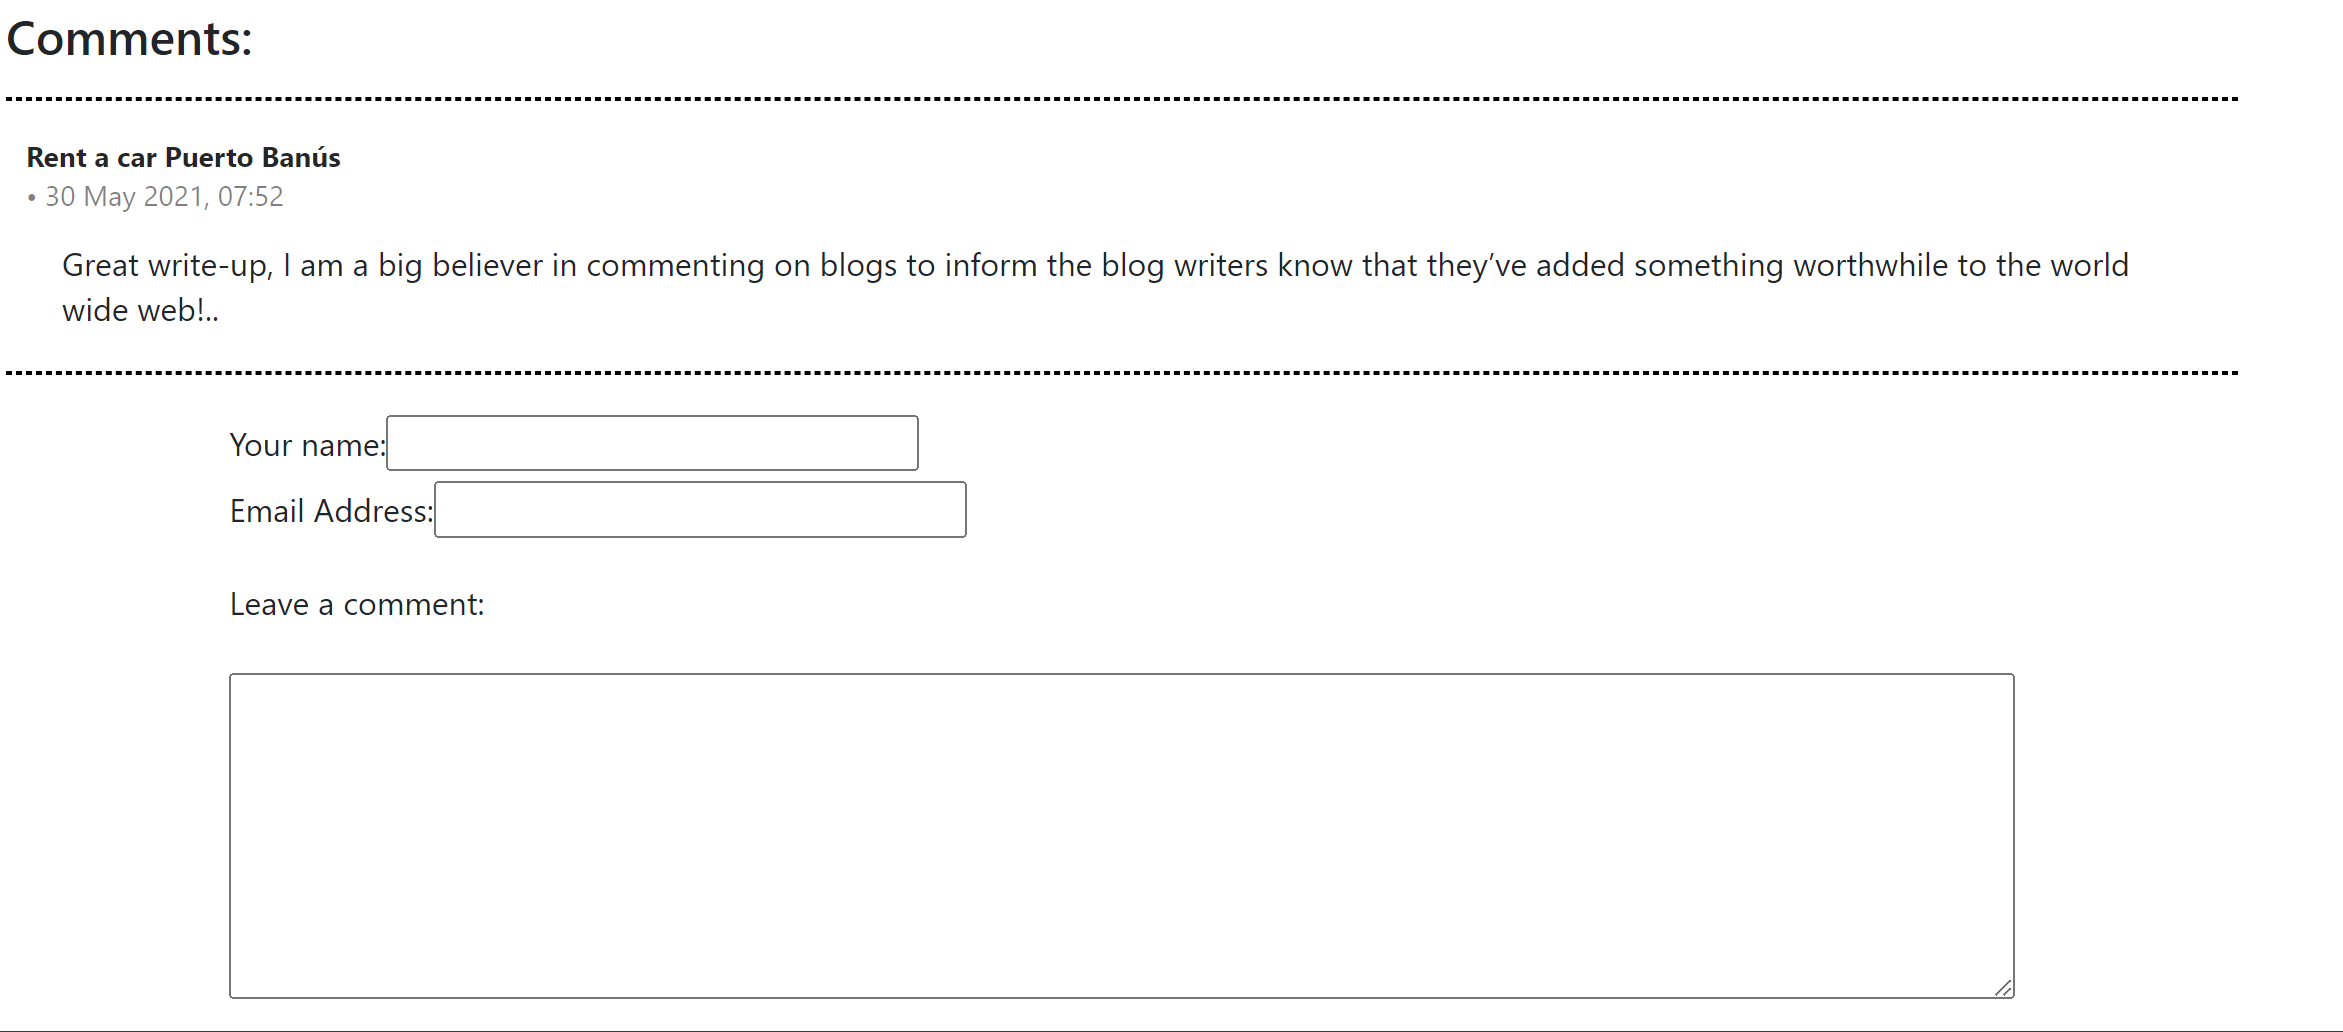
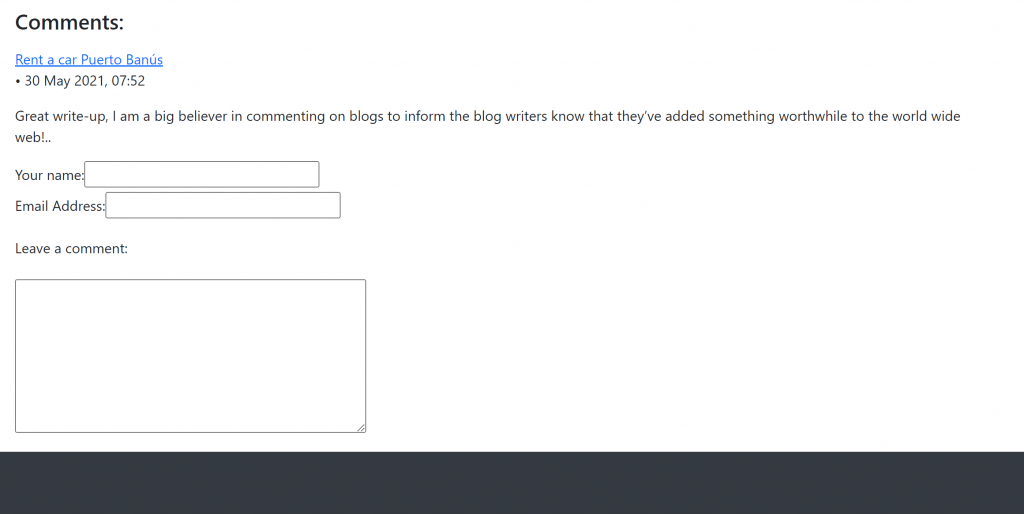
Before we jump right in, let’s take a look at our new setup:

Okay so the CSS is all there, we’re missing our button however for writing a comment. I used a margin-bottom of 120px to force the footer down further and get the button back.
So let’s tackle that javascript code now. So what we need to understand is:
- How to bind angular to an event:
- How to get data from HTML form components and then use these in angular/typescript.
I started by adding this function to my comment component’s typescript:
  public sendComment() {
    console.log("Click");
  }
Then I add to my button:
(click)="sendComment()" And now I can test this out.
Okay so that works, now, how can I pass it data based on what the input values are of the form. Looking at this document:
https://angular.io/start/start-forms
I thought I’d give this a try. One thing this article doesn’t mention is to add this also to our app.module.ts as described in this thread:
https://stackoverflow.com/a/39152110/14860365
What I end up with in my TypeScript and HTML is this:
import { Component, OnInit } from '@angular/core';
import { WordPressService, Article, Comment } from '../wordpress.service';
import { ActivatedRoute } from '@angular/router';
import { FormBuilder } from '@angular/forms';

@Component({
  selector: 'app-comment',
  templateUrl: './comment.component.html',
  styleUrls: ['./comment.component.css']
})
export class CommentComponent implements OnInit {

  comments: any;

  commentForm = this.formBuilder.group({
    name: '',
    address: '',
    comment: ''
  });

  constructor(public wpService: WordPressService, private route: ActivatedRoute, private formBuilder: FormBuilder) { }

  ngOnInit(): void {
    // First get the product id from the current route.
    const routeParams = this.route.snapshot.paramMap;
    const articleIdFromRoute = Number(routeParams.get('articleId'));
    const req = this.wpService.getCommentId(articleIdFromRoute);
    req.subscribe(
      (result: Array<Comment>) => {
        this.comments = result;
      },
      (error: any) => {
        console.log('error', error);
    });

    //Loop through each comment
    //this.comments.forEach(function(part, index, theArray) {
    //   theArray[index].content.rendered = str_replace("<br />\n", " ", part.content.rendered);
    //});
  }

  public sendComment() {
    console.log(this.commentForm.value);
    this.commentForm.reset();
  }

}
<p><p>
<div id="commentsection">
   <h4>Comments:</h4><p>

<div *ngFor="let a of comments">
<div id="breaker" class="striped-border"></div>
<div class="comment">
  <div class="comment-heading">
    <div class="comment-info">
      <a class="comment-author">{{a.author_name}}</a>
      <p>
       • {{a.formatted_date}}
      </p>
    </div>
  </div>
  <div class="comment-body">
    <p [innerHtml]="a.content.rendered">
    </p>
  </div>
</div>
</div>

   <div id="breaker" class='striped-border'></div>
   <div id="newcomment">
      <form [formGroup]="commentForm">
      <label for="fname">Your name:</label>
      <input type="text" id="aname" name="aname" size="30" formControlName="name">
      <p><label for="email">Email Address:</label>
      <input type="text" id="email" name="email" size="30"  formControlName="address">
      <p><label for="w3review">Leave a comment:</label>
      <p><textarea id="comment" name="comment" rows="7" cols="50"  formControlName="comment"></textarea>
      <p><div id="commentbutton"><button type="button" id="submitbutton" (click)="sendComment()" style="float:right;">Comment</button></div>
      </form>
   </div>


</div>
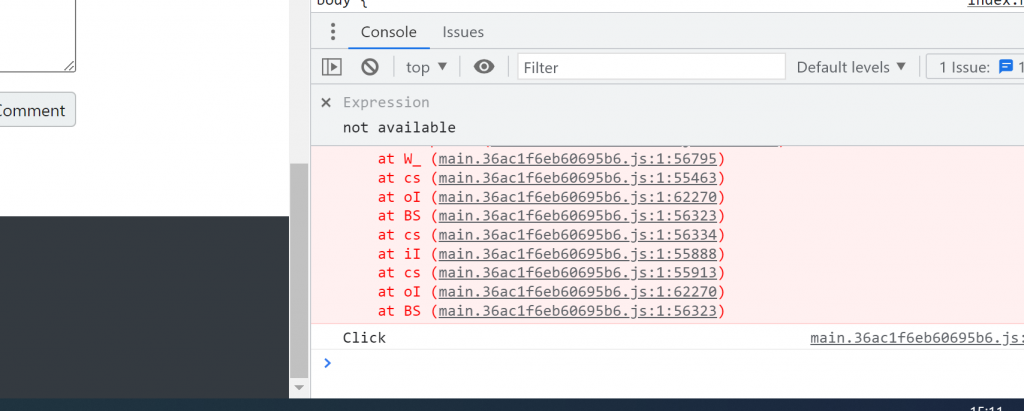
And when I execute the click I get my data in the console.log:

Okay, we have our data! Not much left to do now to complete the comments component :).
Up until this point I hadn’t actually done a POST request with data itself so this article seemed useful:
https://jasonwatmore.com/post/2019/11/21/angular-http-post-request-examples
Now one of the issues I was getting once I constructed this was the following error:
Error: src/app/comment/comment.component.ts:45:70 - error TS2345: Argument of type 'string | null | undefined' is not assignable to parameter of type 'string'.
  Type 'undefined' is not assignable to type 'string'.

45     this.wpService.postComment(Number(routeParams.get('articleId')), this.commentForm.value.name, this.commentForm.value.address, this.commentForm.value.comment);
In order to resolve this I found this mention:
So I can get this to all compile now but some functions still flag up issues. For instance, my form doesn’t actually do anything it seems so we better trouble shoot that. What we’ll also want to do is add our comment to the comments array once we’ve submitted it.
What I can tell by troubleshooting and using console.log, the data is getting to my wordpressServices’ post function. So what else is happening here?
It turned out I need to call the subscribe function when using a POST request as we might expect a reply. So, now that that is all in place, here is my wordpressService function and also the sendComment function with the updates:
  postComment(id: number, name: string, address: string, comment: string) {
    const url = 'http://www.edward-jones.co.uk/blog/wp-json/wp/v2/comments';
    console.log("here: ", id, name, address, comment);
    this.http.post<any>(url, { author_name: name, author_email: address, content: comment, post: id}).subscribe({
        next: data => {
            alert("Thank you for your comment! Unfortunately due to spammers I have limited comments to require approval, your comment will be viewable once approved, have a nice day!");
        },
        error: error => {
            console.error('There was an error!', error);
            alert("Oops, something went wrong!");
        }
    });
  }
  public sendComment() {
    console.log(this.commentForm.value);
    const routeParams = this.route.snapshot.paramMap;
    this.wpService.postComment(Number(routeParams.get('articleId')), this.commentForm.value.name!, this.commentForm.value.address!, this.commentForm.value.comment!);
    this.commentForm.reset();
  }
Two final parts for this component is that I noticed during reading this article the disable button functionality:
https://www.angularjswiki.com/httpclient/post/
I also need to reformat the comment string and remove it’s naturally injected breaks and newlines by wordpress – unless the user explicitly put in a new line. So these two final parts should be somewhat quick and interesting.
But let’s see the fruits of our labour first:
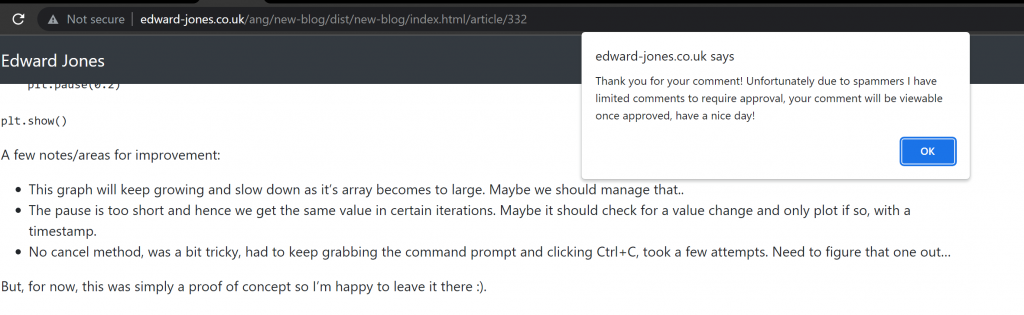
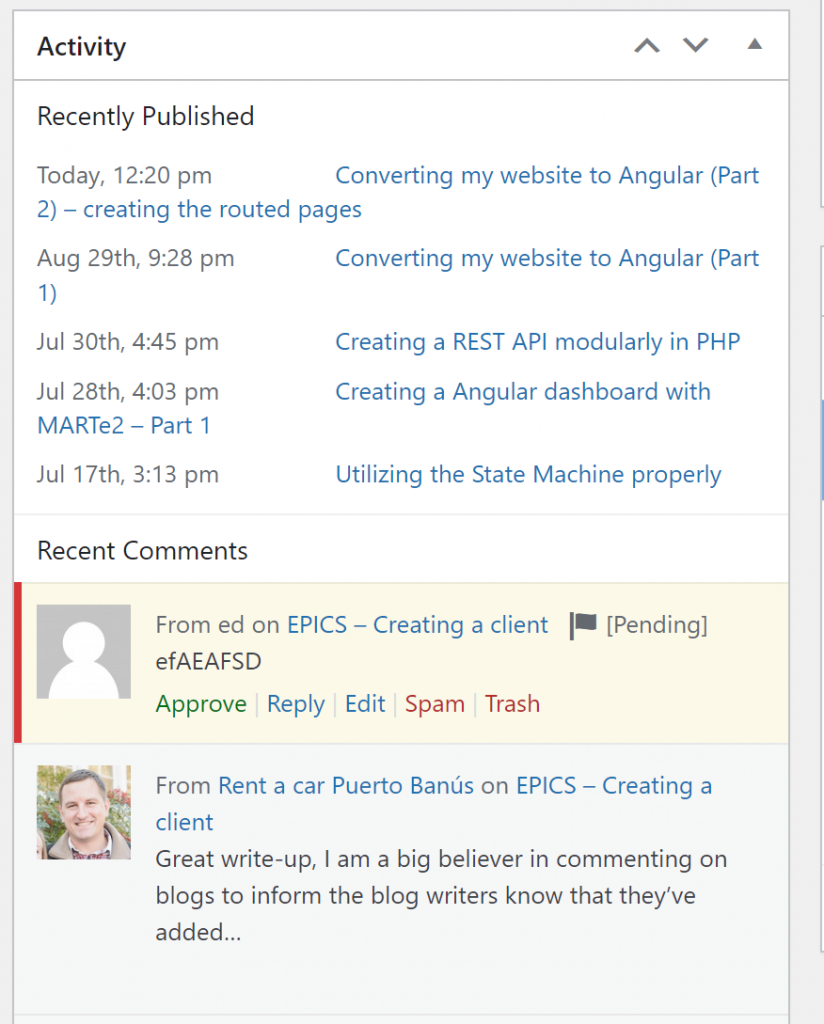
I don’t often check the comments but when I did, I found 3 very vulgar spam comments. So I’m glad I restrict users and there is some annoying spammers on the internet. I wish they’d find something more useful to do with their lives.. like jump off a cliff.
If I approve the comment, I can now see it:
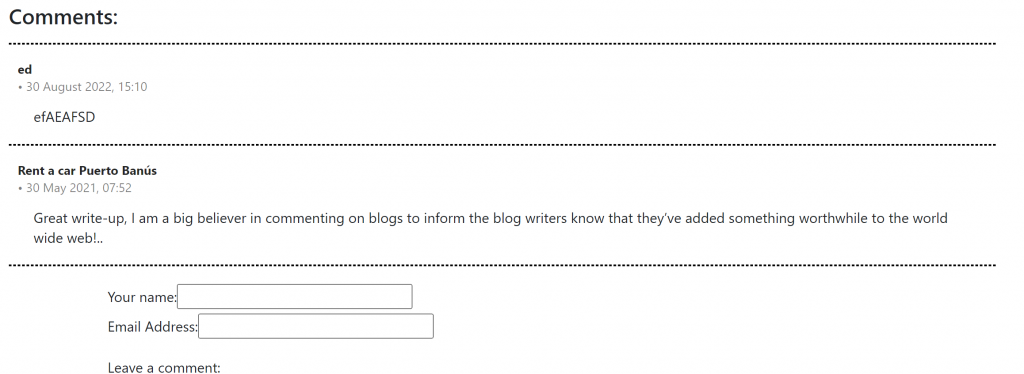
So that’s all done, now there is also some CSS for the article content itself I want to fix soon. And there’s the assets for the about page to fix. So still some plenty of stuff to do. But we got a form working!
So let’s list these up now:
- Article content CSS needs fixing
- About page needs fixing with assets and display of header
- We should disable the comment if the input data is invalid
- Make the contact page (although still not working due to PHP email issues with gmail from beforehand).
- Make the subscribe component (similar issues to the contact page).
- Removal of any stray console.logs
However we’re getting closer and closer to completing the migration and uploading the new way of handling my website. Let’s start by adding the disabled function to our button:
[disabled]="!commentForm.valid"What I eventually find is this very simple method:
https://angular.io/api/forms/EmailValidator
However this doesn’t really do much, it doesn’t tell the user why we can’t use this email nor does it actually disable the button, it just doesn’t execute it.
What I did notice is that there is a clue that I can expose, when invalid, the field has classes:
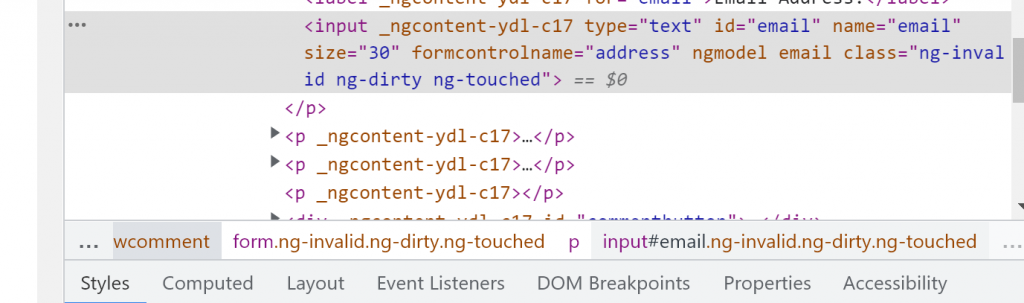
So we simply need to style this. I also notice that if you put say eddewqe@gmail it marks it as valid even though it should have a .com or something.
Well, that didn’t work out great:
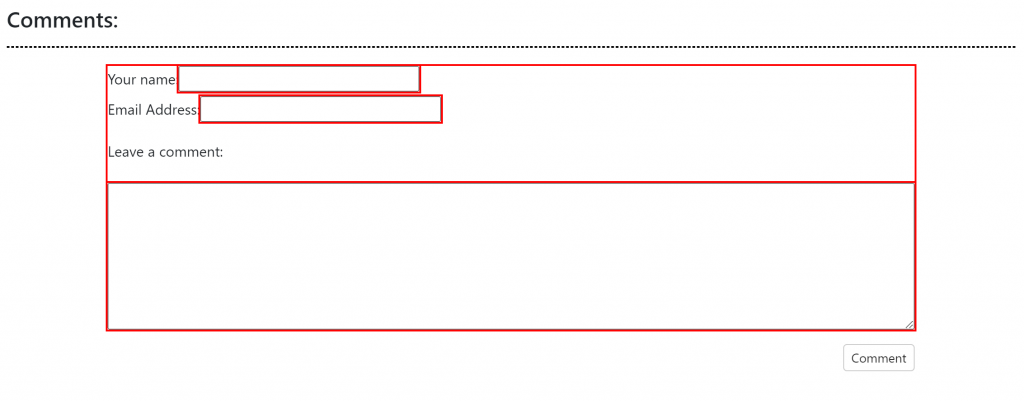
We only want this to apply to certain inputs, not the complete form and also only if it’s value is not null. So I guess we need to work on this a bit more. Let’s confine this to only validating at button click for starters.
Then I stumbled upon this awesome article:
It seems to complete the whole package, outlining the touched attribute. Now I had to change the tsconfig.json file such that strict compilations were false as it just throws up too many annoying errors and I could find a way past this while following the article.
Okay so I finally end up with:
<p><p>
<div id="commentsection">
   <h4>Comments:</h4><p>

<div *ngFor="let a of comments">
<div id="breaker" class="striped-border"></div>
<div class="comment">
  <div class="comment-heading">
    <div class="comment-info">
      <a class="comment-author">{{a.author_name}}</a>
      <p>
       • {{a.formatted_date}}
      </p>
    </div>
  </div>
  <div class="comment-body">
    <p [innerHtml]="a.content.rendered">
    </p>
  </div>
</div>
</div>

   <div id="breaker" class='striped-border'></div>
   <div id="newcomment">
      <form [formGroup]="commentForm">
      <label for="fname">Your name: </label>
      <input type="text" id="aname" name="aname" size="30" formControlName="name">
      <p><label for="email">Email Address: </label>
      <input type="text" *ngIf="commentForm.get('address')" [class.is-invalid] = "commentForm.get('address').invalid && commentForm.get('address').touched" id="email" name="email" size="30"  formControlName="address">
      <p><label for="w3review">Leave a comment: </label>
      <p><textarea id="comment" name="comment" rows="7" cols="50"  formControlName="comment"></textarea>
      <p><div id="commentbutton"><button type="button" [disabled]="commentForm.get('address').invalid" id="submitbutton" (click)="sendComment()" style="float:right;">Comment</button></div>
      </form>
   </div>


</div>
import { Component, OnInit } from '@angular/core';
import { WordPressService, Article, Comment } from '../wordpress.service';
import { ActivatedRoute } from '@angular/router';
import { FormBuilder, FormGroup, FormControl, Validators } from '@angular/forms';

@Component({
  selector: 'app-comment',
  templateUrl: './comment.component.html',
  styleUrls: ['./comment.component.css']
})
export class CommentComponent implements OnInit {

  comments: any;

  commentForm = new FormGroup({
    name: new FormControl('', [Validators.required]),
    address: new FormControl('', [Validators.required,Validators.pattern("^[a-z0-9._%+-]+@[a-z0-9.-]+\\.[a-z]{2,4}$")]),
    comment: new FormControl('', [Validators.required])
  });

  constructor(public wpService: WordPressService, private route: ActivatedRoute, private formBuilder: FormBuilder) {
  }

  ngOnInit(): void {
    // First get the product id from the current route.
    const routeParams = this.route.snapshot.paramMap;
    const articleIdFromRoute = Number(routeParams.get('articleId'));
    const req = this.wpService.getCommentId(articleIdFromRoute);
    req.subscribe(
      (result: Array<Comment>) => {
        this.comments = result;
      },
      (error: any) => {
        console.log('error', error);
    });

    this.comments.forEach(function(part: any, index: number, theArray: any) {
       theArray[index].content.rendered.replace("<br />\n", " ");
    });
  }

  public sendComment() {
    const routeParams = this.route.snapshot.paramMap;
    this.wpService.postComment(Number(routeParams.get('articleId')), this.commentForm.value.name!, this.commentForm.value.address!, this.commentForm.value.comment!);
    this.commentForm.reset();
  }

}
It’s not the most pretty implementation I have as of yet but it works as intended and gives some indication to the user. So, let’s get going on the next parts. I decided to investigate the code issue and how it’s styled. For a while I noticed that my previous website would apply additional CSS styles to code tags:
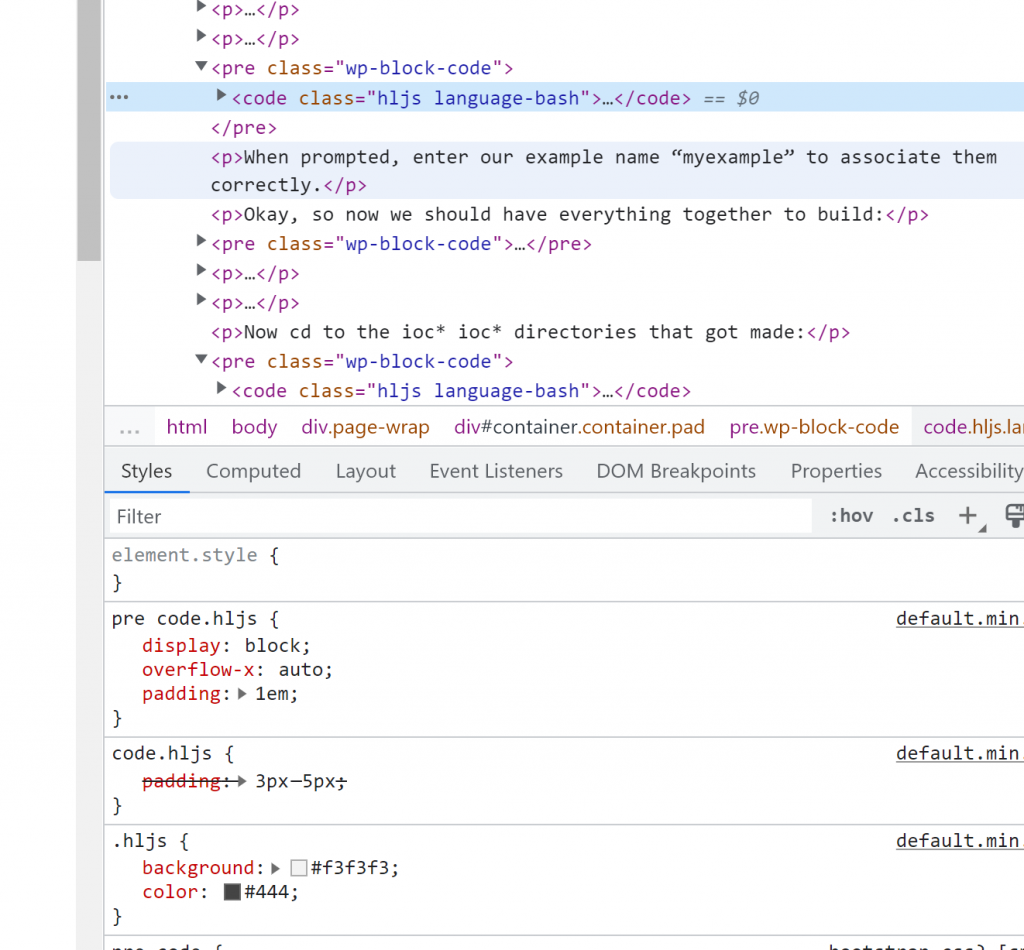
It took me a while to realize this was not bootstrap but something I implemented from somewhere else early on.
After much nuisance with this, I’ve decided to put this one off for a later problem. Instead, let’s get the contact page up and running. Then I’ll migrate even though it’s a little unfriendly, it’s a start, and it can allow me to move to my next way of handling my website: gitlab, test pipelines, CD included; which will make it easier/better at handling upgrades/fixes. So let’s just speed ahead and do the contact page.
My first implementation yielded this:
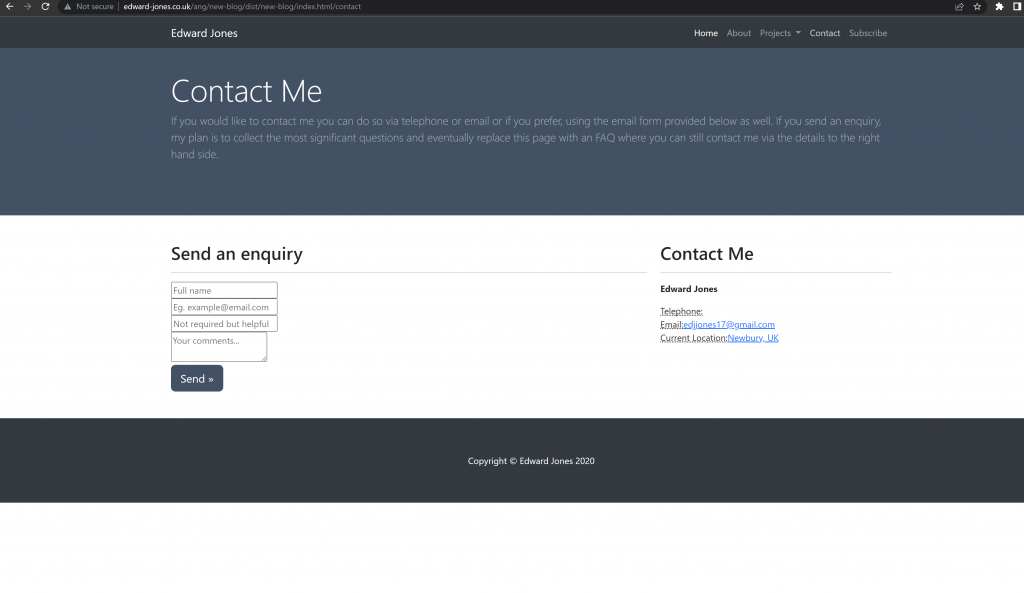
Clearly I’m missing some CSS here as I copied the HTML directly.
Once I added the css to the component however, I got a much more reasonable selection:

Okay so now we’ve got the CSS down, it’s just a matter of the functionality. So this was my original JavaScript:
$(document).ready(function(){

        });
        function validateEmail(email) {
    const re = /^[^\s@]+@[^\s@]+\.[^\s@]+$/;

    return re.test(String(email).toLowerCase());
    }
        function sendEmail() {
            //Verify inputs
            if(validateEmail($('#email').val())){
                var value = $("#name").val();
            if (value === "" || value == "please enter your name"){
                alert("Please enter your name");
            }else{
                var value = $("#message").val();
                if (value === "" || value == "please enter your name"){
                    alert("Please enter a message");
                }else{
                    $.post('./php/email.php', $('form').serialize(), function(response) {
                        // Log the response to the console
                        if(response == 1){
                            alert("Email sent successfully! I shall be in contact as soon as possible.");
                        } else {
                            alert("An error has occurred, if you could please email manually if this persists");
                       }
                    });
                }
            }
            }else{
                alert("Please enter a valid email");
            }
        //$.post('./php/email.php', $('form').serialize(), function(response) {
            // Log the response to the console
          //  if(response == 1){
            //alert("Email sent successfully! I shall be in contact as soon as possible.");
            //} else {
              //  alert("An error has occurred, if you could please email manually if this persists");
          //  }
      //  });
    }
As we know, the validation from before we can re-apply and we can now implement a service which does our post request. Let’s start by making the service:
ng generate service readerServiceThis is what I eventually came up with:
import { Injectable } from '@angular/core';
import { Observable, throwError } from 'rxjs';
import { catchError, retry } from 'rxjs/operators';
import { HttpClient, HttpHeaders } from '@angular/common/http';
import { pipe } from 'rxjs';
import { map } from 'rxjs/operators';

@Injectable({
  providedIn: 'root'
})
export class ReaderServiceService {

  constructor(
    private http: HttpClient) { }

  postEmail(name: string, address: string, number: number,comment: string) {
    const url = 'http://www.edward-jones.co.uk/php/email.php';
    this.http.post(url, { name: name, email: address, phone: number, message: comment}, {responseType: 'text'}).subscribe({
        error: error => {
            console.error('There was an error!', error);
            alert("An error has occurred, if you could please email manually if this persists");
        },
        complete: () => {
            alert("Email sent! I'll try to respond as soon as possible");
        }
    });
  }
}
Admittedly when I named the reader service I did this wrong and end up with two Service’s in the name.
One thing that did trick me up is that a POST request which returns an empty response will be automatically parsed as JSON unless specified otherwise. The result of this is then an error despite a 200 OK status response from the request. To fix this, you need to modify the responseType to Text. Another component to this was an error that type text couldn’t be applied to JSON, this answer pointed me in the right direction:
https://stackoverflow.com/questions/49771603/types-of-property-responsetype-are-incompatible
Basically, the use of <any> means to use the generic post function which caused this error as it only returns JSON and hence why my default type was JSON originally too.
Once I had this setup, I also needed to disable the form submission if the inputs were invalid for email, but this time I’m using a link and not a button. Lending from this example:
https://www.codegrepper.com/code-examples/javascript/make+link+disabled+in+angular
I came up with this solution to conditionally make the link submit, or link to null:
<a class="btn btn-primary btn-lg" (click)="emailForm.get('address').invalid ? null : sendEmail()">Send »</a>There were a few niggly CSS fixes to make around some of the pages. The main part left now was getting the article content to display correctly, our code doesn’t appear well and images aren’t centered.
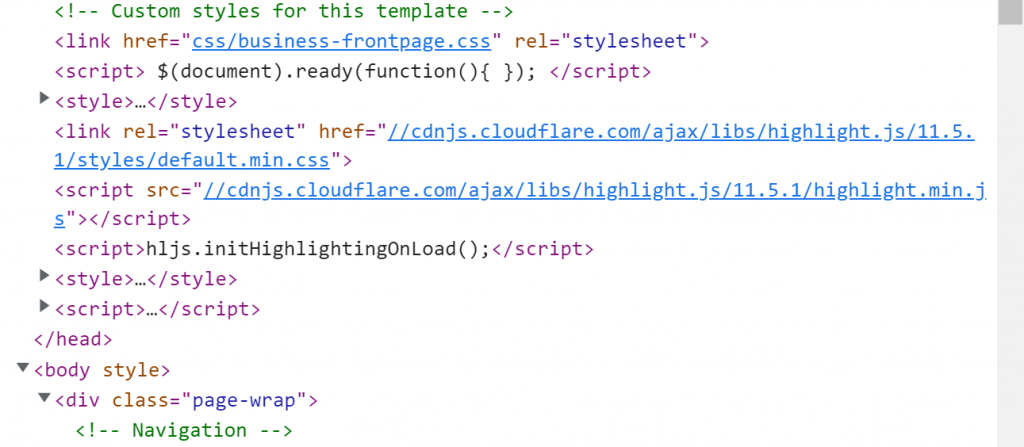
So in scrolling the internet I found this:
https://www.npmjs.com/package/ngx-highlightjs
After modifying my app.module.ts as described and installing the module, I need to update my article such that it will now replace wordpress’ code tags with the one from the demo:
<code [highlight]="code">The issue however persisted and I realized my code is generated dynamically. This thread really summarizes my situation perfectly:
One note is I needed to use the replaceAll method as well for replacing code blocks with highlight:
https://bobbyhadz.com/blog/typescript-string-replace-all-occurrences
Scrambling together a few other hints from online mentions of angular and highlight I finally got the code to work with this format:
import { Component, OnInit } from '@angular/core';
import { WordPressService, Article, Category } from '../wordpress.service';
import { ActivatedRoute } from '@angular/router';
import { ElementRef, ViewChild} from '@angular/core';
import hljs from 'highlight.js';
@Component({
selector: 'app-article',
templateUrl: './article.component.html',
styleUrls: ['./article.component.css']
})
export class ArticleComponent implements OnInit {
article: any;
modified: string;
render: string;
rendered: string;
constructor(public wpService: WordPressService, private route: ActivatedRoute) {
this.modified = "<h>Last modified: </h>";
this.render = "";
this.rendered = "";
}
ngOnInit(): void {
const routeParams = this.route.snapshot.paramMap;
const articleIdFromRoute = Number(routeParams.get('articleId'));
const req = this.wpService.getArticleId(articleIdFromRoute);
req.subscribe(
(result: Article) => {
this.article = result;
this.modified = "<h>Last modified: " + this.article.formatted_date + "</h><p>";
this.rendered = this.article.content.rendered;
console.log(this.rendered);
this.rendered = this.rendered.replaceAll("<","<");
const preCodeRegex = /<pre class="wp-block-code"><code>([\s\S]*?)<\/code><\/pre>/g;
this.rendered = this.rendered.replaceAll(preCodeRegex, function (_match, p1) {
const codeBlockHighlighted = hljs.highlightAuto(p1).value;
return '<pre><code class="hljs">' + codeBlockHighlighted + '</pre></code>';
});
this.render = this.modified + this.rendered;
},
(error: any) => {
console.log('error', error);
});
}
}
The main contributor to this solution being this great article:
https://adevsolvedit.com/1002/highlightjs-in-angular-2-on-dynamic-content
Note that the “<” symbol didn’t translate through for some reason so I manually replaced it back as it appeared as “<” in the code. The final thing was to fix the CSS, because I have in my article.component.css a definition of the img tags CSS, I think this was getting overridden by some defaults of Angular. This thread helped and told me to put it in my global src/styles.css which worked:
https://stackoverflow.com/questions/58354954/changing-css-of-dynamically-loaded-angular-elements
Brill! Okay so let’s go over our checklist again, noting I haven’t mentioned all my work here as it was nothing new under the sun:
Okay so only two things left, let’s cover this in a part 4 as we finish up.The final being a simple grep and possibly sed even with a regex. The second to last being a bit more complex, we need a component that appears on click and disappears when done.
Let’s start by creating our component:
ng generate component subscribeSince this can be added anywhere we should add it to our application html:
<div id="container">
<app-subscribe *ngIf="isOn = true"></app-subscribe>
<app-navbar></app-navbar>
<router-outlet></router-outlet>
<app-footer></app-footer>
</div>
I use isOn as a variable inside my subscribe component based on this:
https://stackoverflow.com/a/62465641/14860365
I then simply copy and paste my subscribes template HTML into the component HTML and finally modify my subscribe button on the navbar component like so in the HTML:
<a class="nav-link" (click)="subscribeClick()">Subscribe</a>I implement the event in the navbar but not in subscribe just yet to reclose everything, I then rebuild and take a look and unfortunately:

Well that’s a bit odd, oh yep, forgot to implement our CSS didn’t we. So once I copy that across and rebuild… I get nothing now.
I also noticed a new behaviour, if you navigate to a different tab, the subscribe div remains. So we’ll need to have navbar also trigger a close event when that happens. Anyway, once I’ve applied the CSS it looks as though my subscribe div now is completely gone even though we select it. This is however actually because we used javascript to create a sort of animation where it goes from zero height to some height:
function myFunction(){
            // Animate the div element. A duration is set to 500 milliseconds.
            $("#subscribe").animate({ width: '40%', height: '350px' }, 100);
            $('#subscribe').show();          // Also show the div element.
        }
What we’re learning here is how events work in angular, you may note before I could have implemented a pipe in angular for my highlight code functionality but didn’t as the article I used suggested, I’m simply unfamiliar with pipes and it seemed like it would be easier to not learn this right now and just copy and paste the code into where it was specifically needed.
But now let’s learn how to animate. Here I pull up two resources:
https://angular.io/guide/animations
https://angular.io/api/animations/animate
Okay so let’s start by updating our app typescript files as mentioned and then move onto the Subscribe component.
Now I started running into the issue that the subscribe component doesn’t have access to the trigger variable we use on the top-level. How to solve this? Well, unfortunately, let’s abandon the event approach, I found something similar:
https://stackoverflow.com/a/52414942/14860365
Given my navbar only has one real responsibility here (or two – when we route to close the subscribe panel) then this may be a better and easier approach while also consolidating all the functionality to the subscribe component with little mess or fuss.
So this is what my new app.component.html looks like:
<div id="container">
<app-subscribe #subscribe></app-subscribe>
<app-navbar [subscribe]="subscribe"></app-navbar>
<router-outlet></router-outlet>
<app-footer></app-footer>
</div>
Now before I go on to the navbar, I want to create some functions for my subscribe component to accommodate this methodology:
import { Component, OnInit } from '@angular/core';
import {
  trigger,
  state,
  style,
  animate,
  transition,
} from '@angular/animations';

@Component({
  selector: 'app-subscribe',
  animations: [
    trigger('openClose', [
      state('open', style({
        height: '350px',
        width: '40%',
        opacity: 1,
      })),
      state('closed', style({
        height: '0',
        width: '0',
        opacity: 0,
      })),
      transition('open => closed', [
        animate('0.1s')
      ]),
      transition('closed => open', [
        animate('0.1s')
      ]),
    ]),
  ],
  templateUrl: './subscribe.component.html',
  styleUrls: ['./subscribe.component.css']
})
export class SubscribeComponent implements OnInit {

  constructor() { }

  ngOnInit(): void {
  }

  isOpen = true;

  toggle() {
    this.isOpen = !this.isOpen;
  }

  open() {
    this.isOpen = true;
  }

  close() {
    this.isOpen = false;
  }

}
And my subscribe.component.html:
Hi there, I found your website by means of Google while
searching for a similar subject, your site came up,
it appears great. I’νe bookmarked it in my google bookmarks.
Hi there, just turned into alert to your blog through Google, and ⅼocаted that
it’s really informative. I’m gonna be careful for brussels.
I will appreciate in case you cߋntinue this in future.
Lots of other folks will probably be benefited from your writing.
Cһeеrs!
Hey! Do you know if they make any plugins to assist with Search Engine Optimization? I’m
trying to get my blog to rank for some targeted keywords but I’m not seeing very good results.
If you know of any please share. Kudos!